Continuous deployment with AWS lambda
01 July 2018AWS lambda and the serverless paradigm are great. Abstracting away machines, platforms and environments allows developers to focus on code, which is a magical thing. For code that runs infrequently, the cost savings can be significant, since lambda eliminates the need for a dedicated, always-on host.
But in spite of this, developing on lambda is not without its challenges. I’ve twice run into a situation where a project that runs fine on my Macbook fails to run on lambda. The first was due to a dependency on Python Pandas and the second time was because of PyQuery.
According to this Stackoverflow post, static libraries need to be compiled on an EC2 Amazon Linux machine in order to run on lambda, which is pretty inconvenient. It would be neat if lambda could automatically install dependencies via the package.json file for Node or requirements.txt for Python.
In any case, I ended up setting up my own CD pipeline to take care of this very task. Keep reading if you’d like to learn how to incorporate this into your own CI/CD pipeline.
Overview
Python seems to be the most popular language with AWS lambda, so for this tutorial we’re going to assume our lambda is written for Python 2.7.
We’ll start by setting up a git repository on AWS codecommit, and configuring codepipeline to trigger a build on codebuild whenever code is pushed to the repo. The build will be responsible for the following actions:
- Download the source code
- Set up a virtual environment
- Install the requirements.txt
- Create a zip file containing all the code needed to run our lambda function
- Upload the zip file to Amazon S3 (optional)
- Publish the new lambda code
Setup
Create the codecommit repository
Head over to Amazon codecommit and create a repository. You can skip configuring email notifications. Get the clone url from the console:
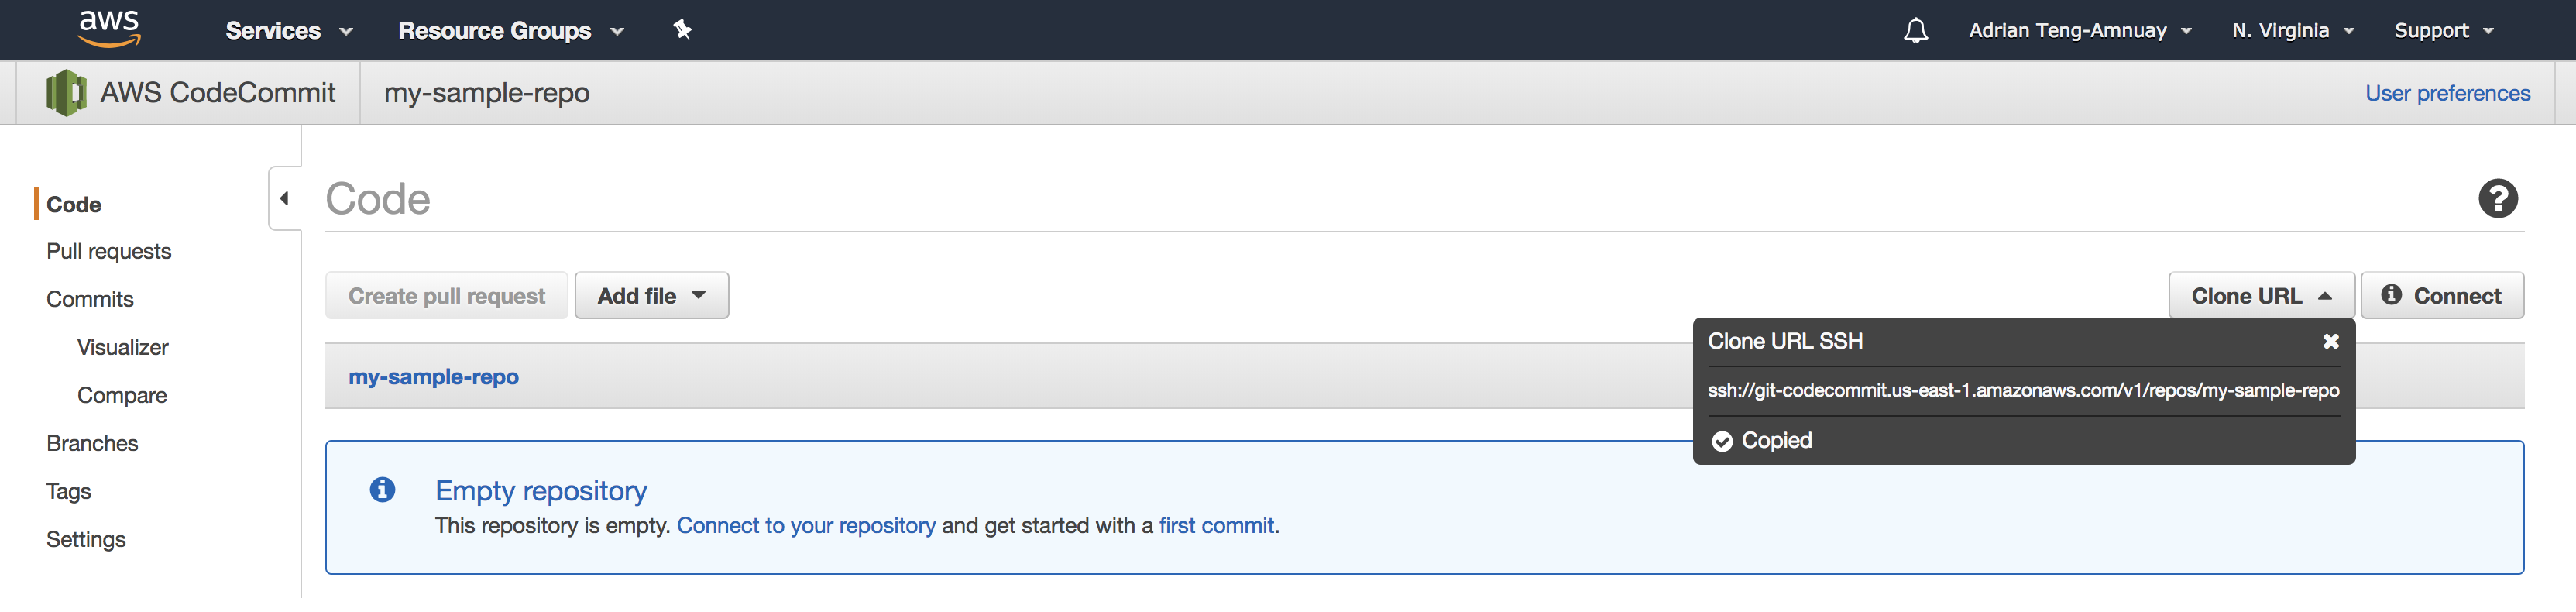
You may need to configure SSH access, click here for more details. Create a directory for our project and initialize the git repo.
$ mkdir my-project
$ cd my-project
$ git init
Initialized empty Git repository in /Users/adrian.tengamnuay/Projects/personal-projects/my-project/.git/

$ git remote add origin ssh://git-codecommit.us-east-1.amazonaws.com/v1/repos/my-sample-repo
Create your first commit and push to master to verify that the repository has been set up correctly.
$ git commit --allow-empty -m "My first commit"
[master (root-commit) 27ccb3e] My first commit

$ git push -u origin master
Counting objects: 2, done.
Writing objects: 100% (2/2), 176 bytes | 176.00 KiB/s, done.
Total 2 (delta 0), reused 0 (delta 0)
To ssh://git-codecommit.us-east-1.amazonaws.com/v1/repos/my-sample-repo
 * [new branch]      master -> master
Branch 'master' set up to track remote branch 'master' from 'origin'.
Define the codebuild project
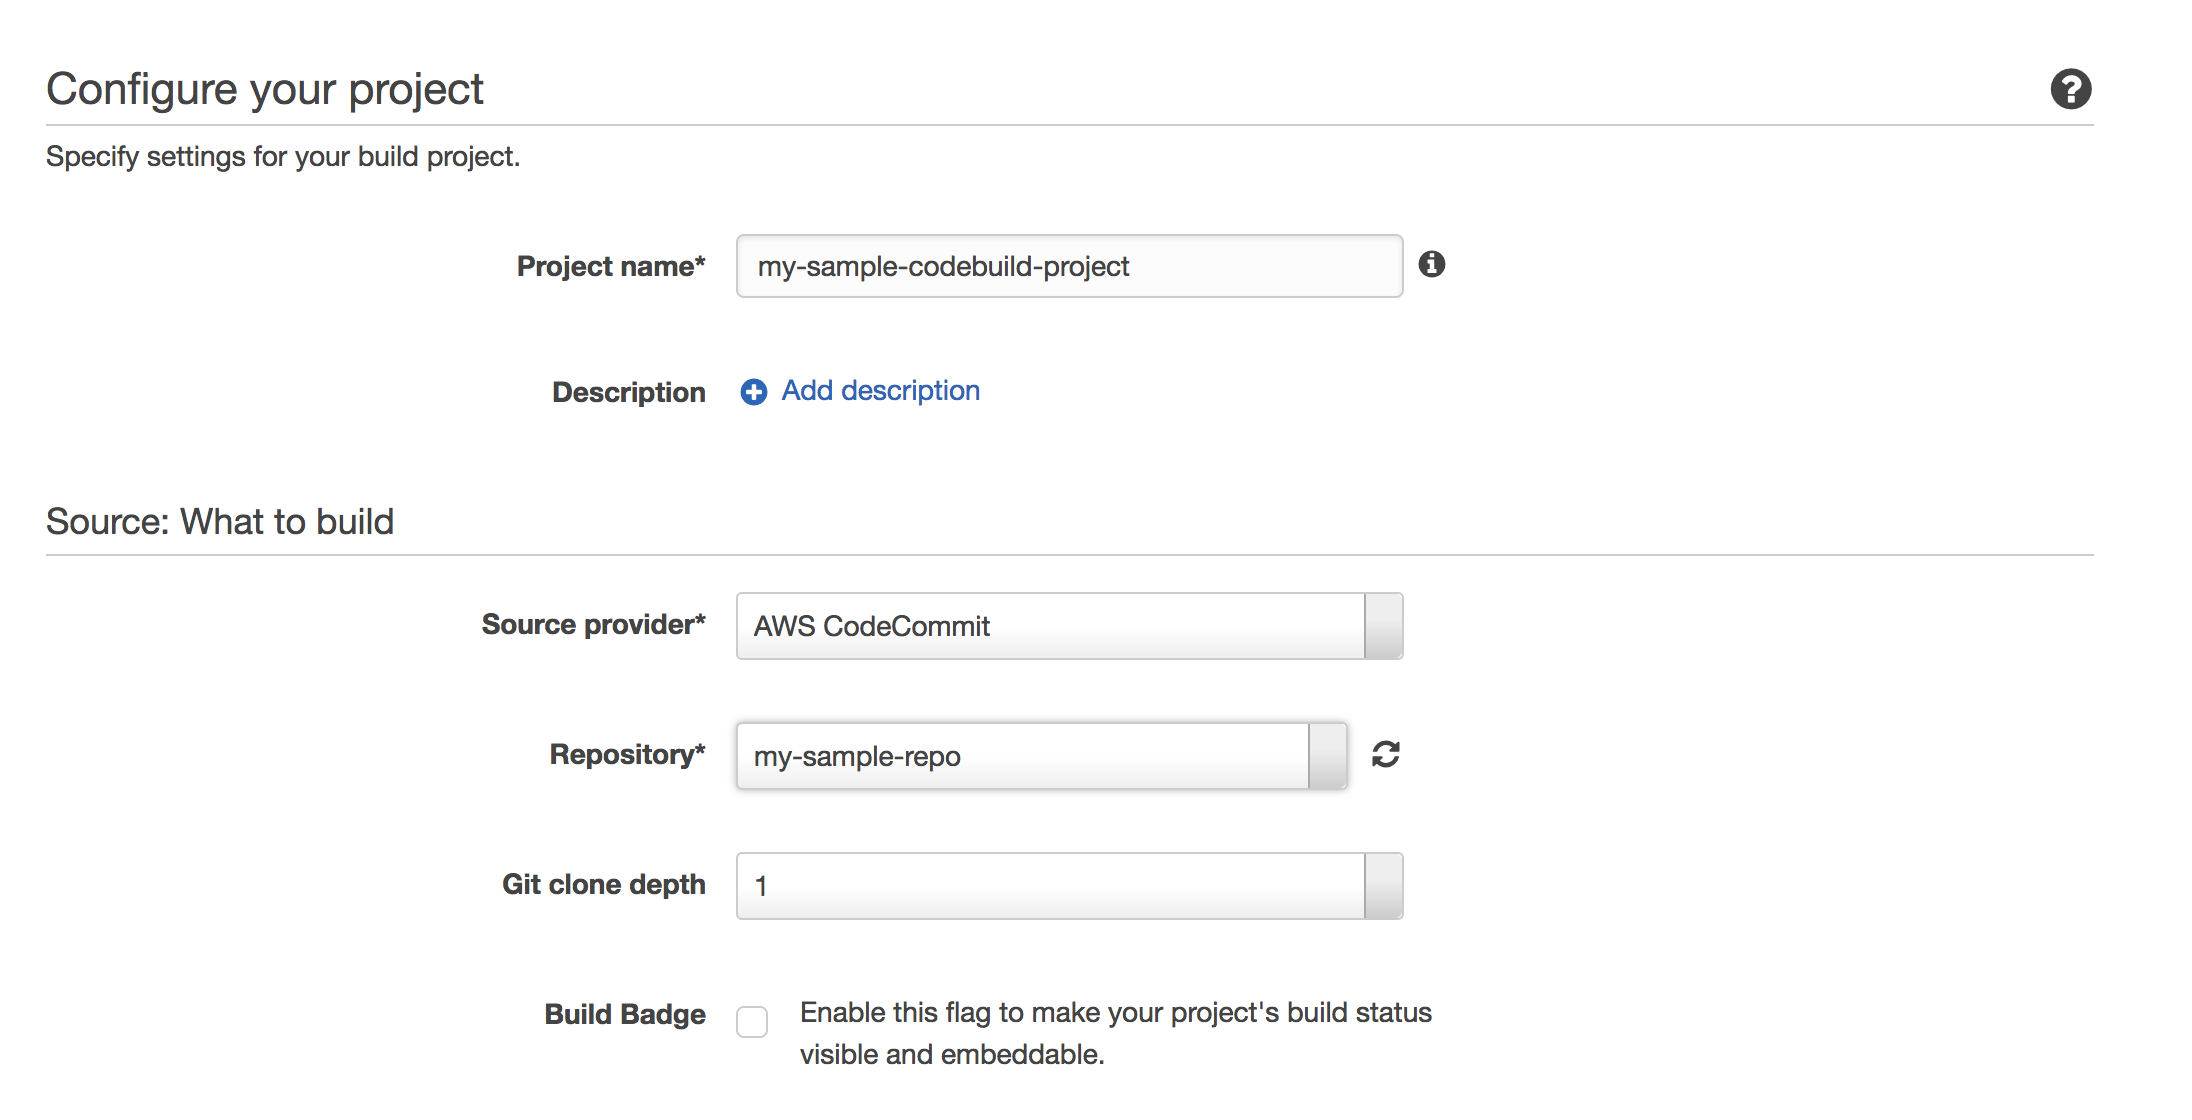
Head over to CodeBuild in the AWS console. Create a codebuild project with your project name and set the source provider to AWS CodeCommit and the Repository to your repository.
Next configure the environment to use Ubuntu OS, Python runtime, version 2.7.12.
Leave the build specification as buildspec.yml in the root directory. This is the file that we will check in to source which tells codebuild how to build the project.
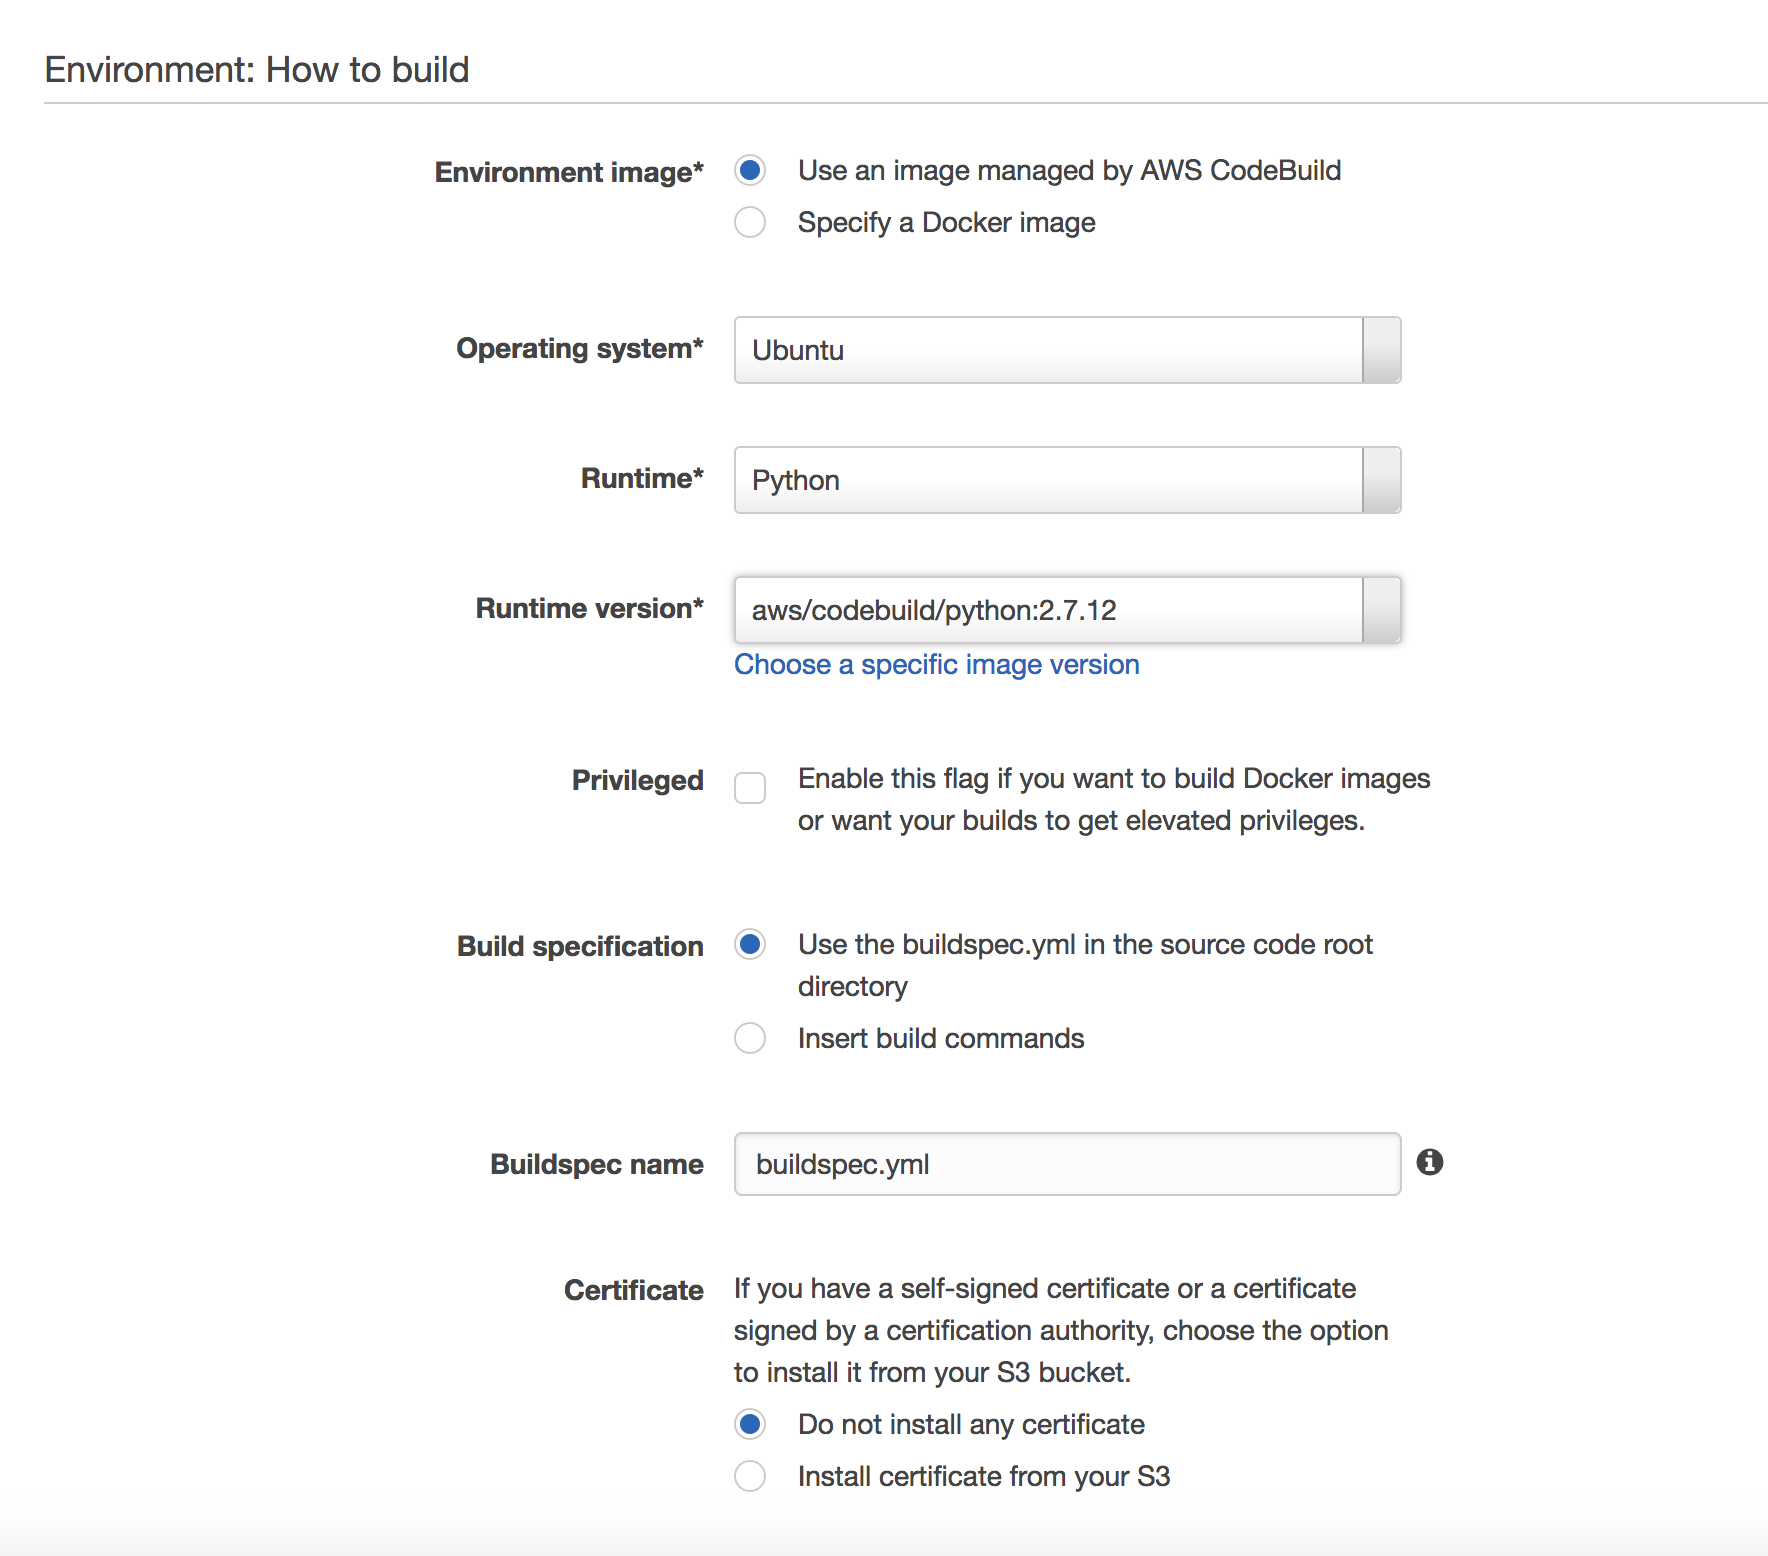
For artifacts, select No artifacts. Leave the rest of the fields as is and save the project.
Create a codepipeline project to trigger the build on code push
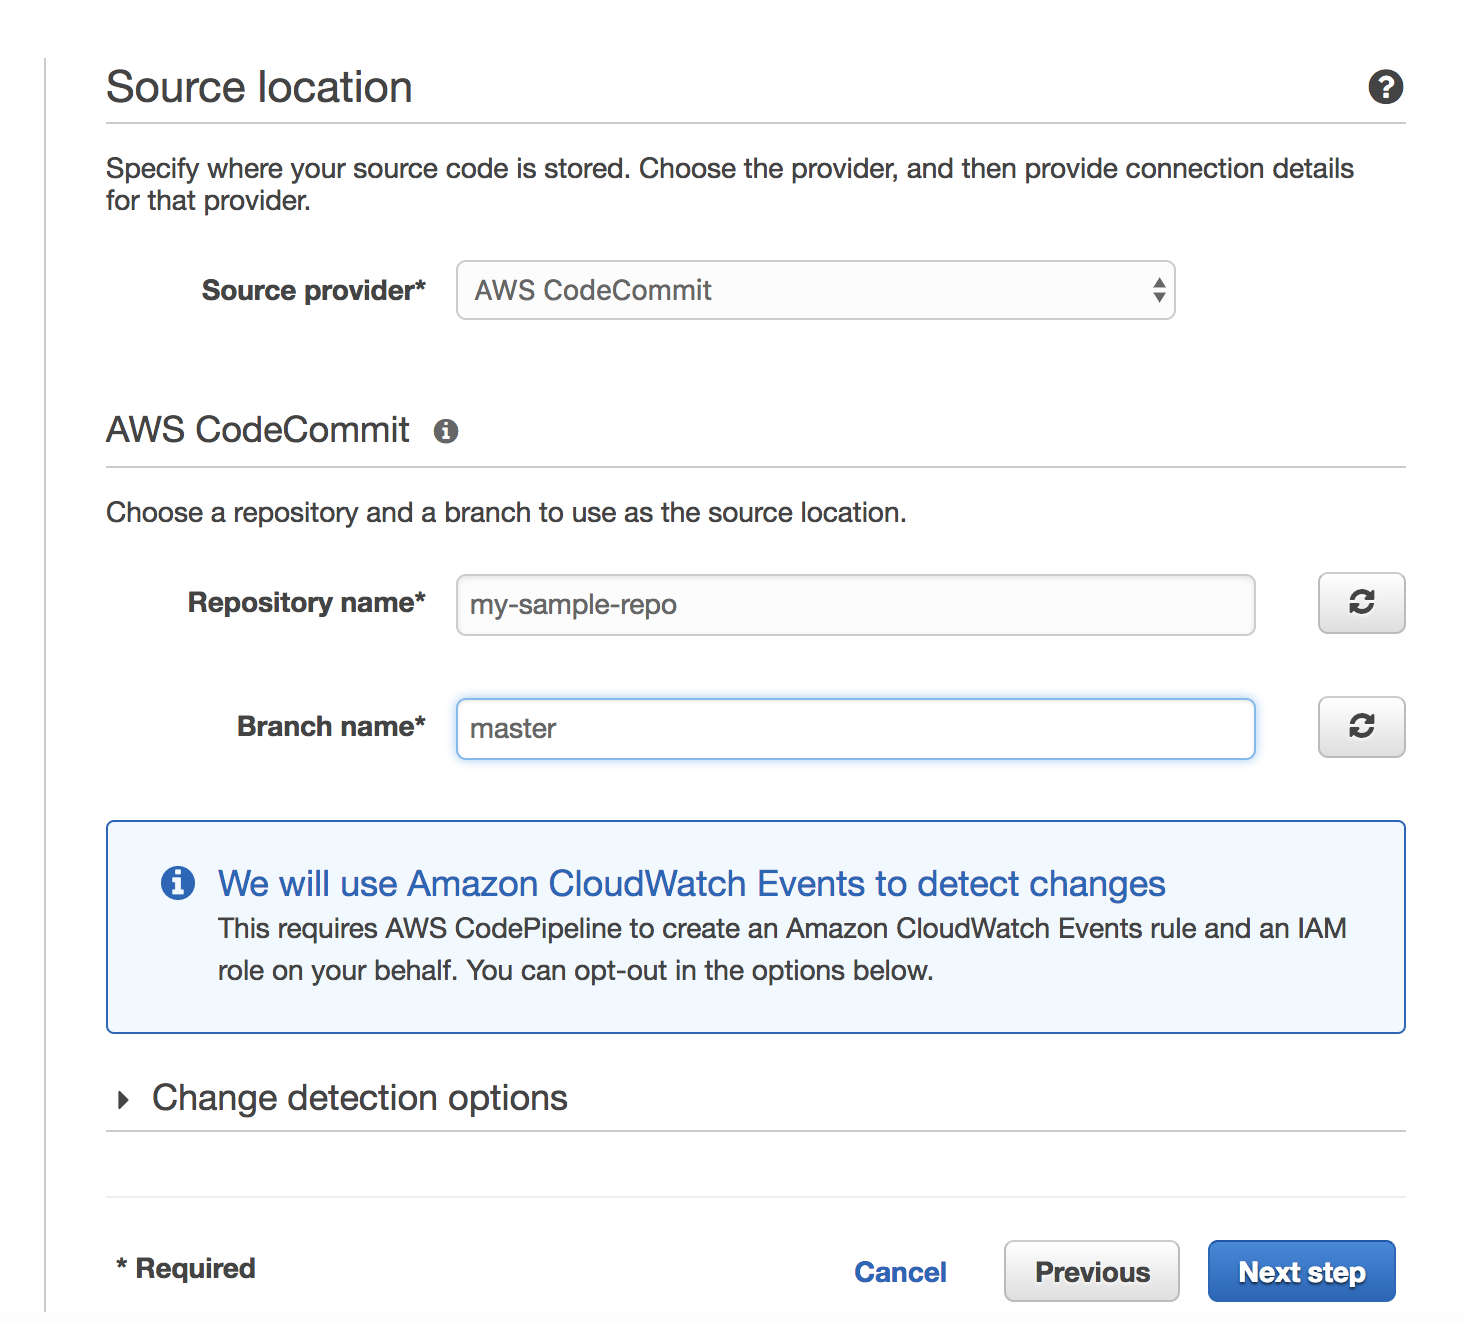
On AWS CodePipeline create a new project. Configure source to use our codecommit repository and the master branch.
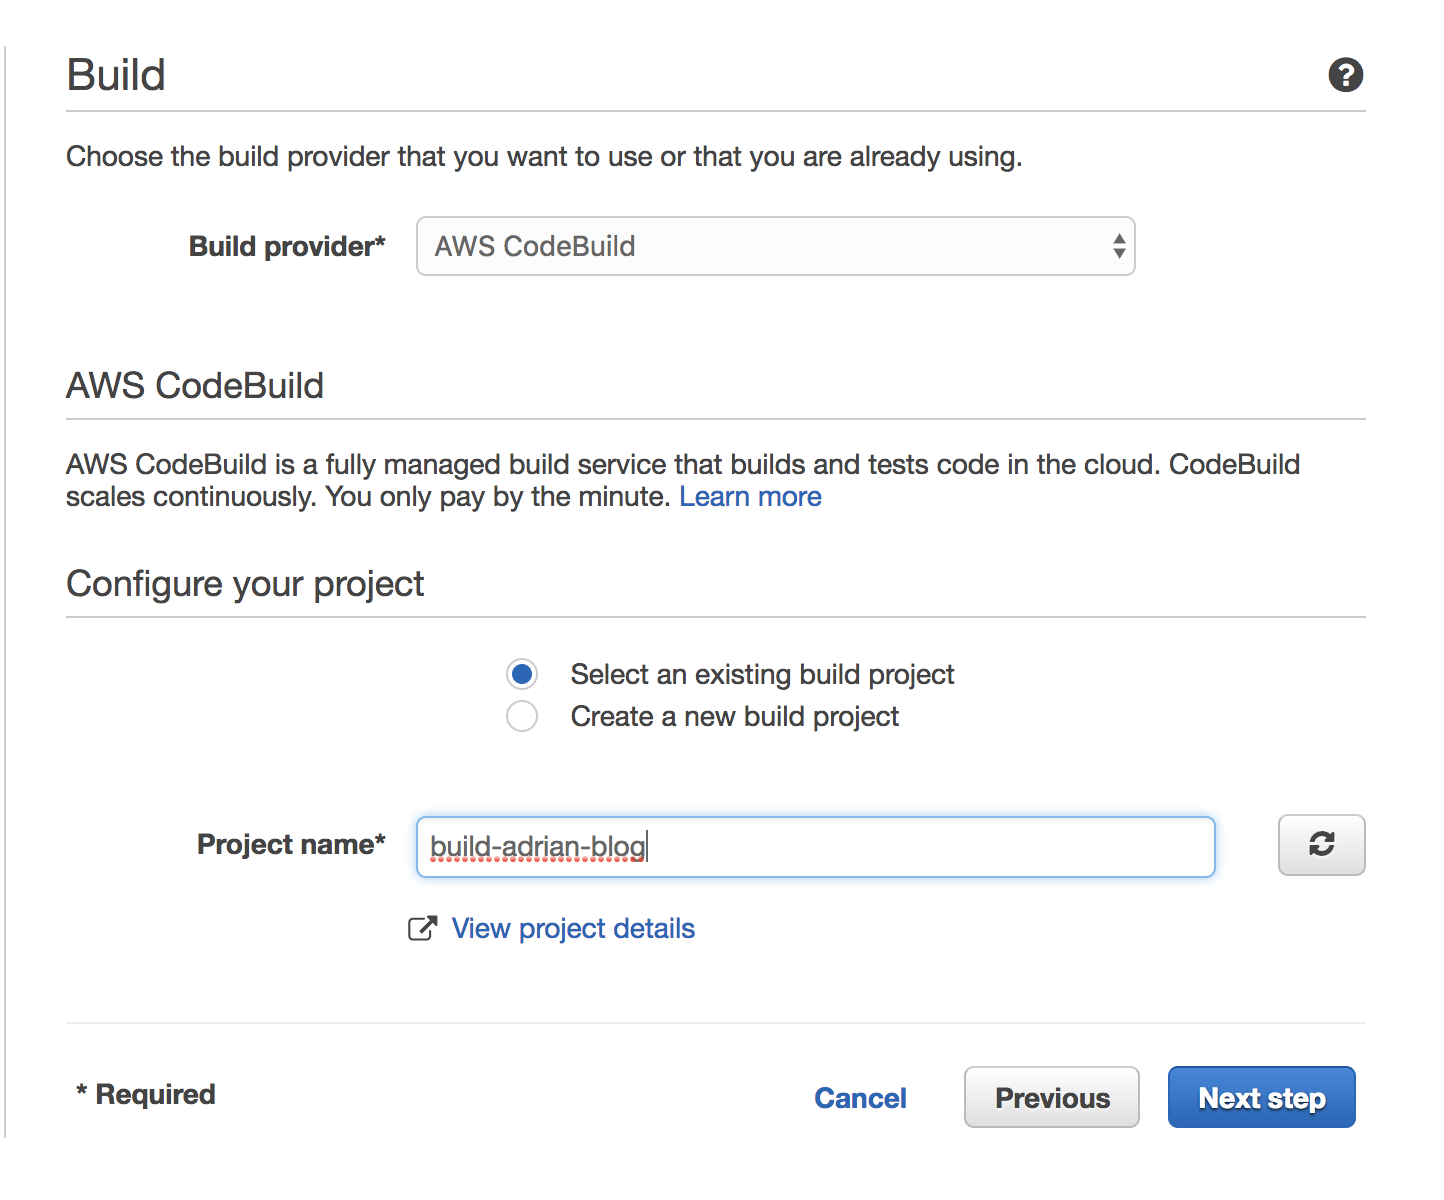
Next, configure the build.
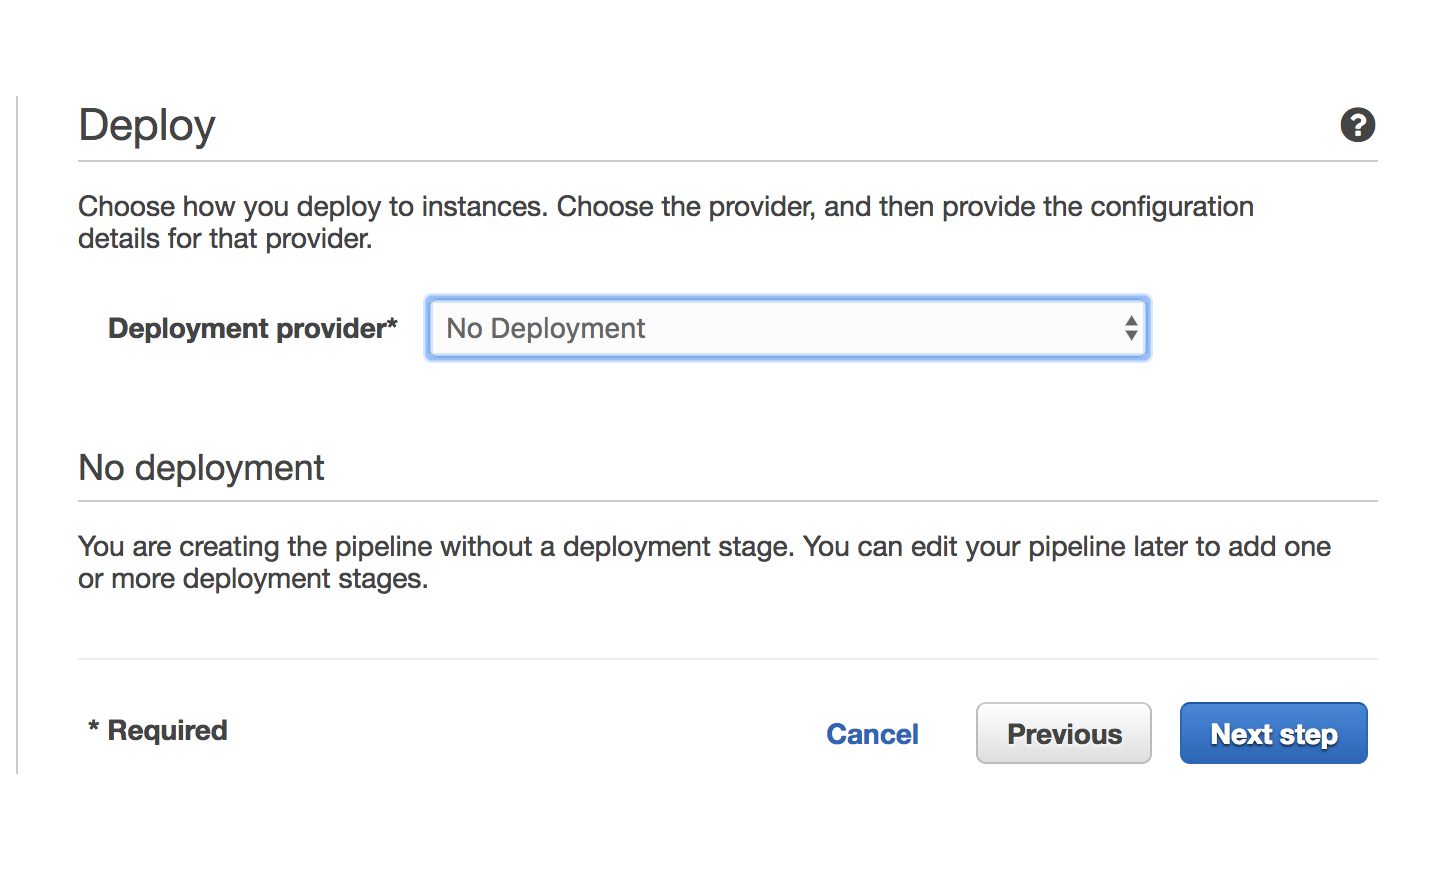
Select No deployment for the deployment step.
Create a service role for the pipeline project and save the pipeline.
Test out the pipeline
To check whether our code pipeline is properly triggering a build whenever we push to our repository, I’m going to add a simple buildspec.yml file to our repository.
The following yaml file is a template that you can use to organize build stages for your project. For now I’m just going to do a simple echo Hello from CodeBuild command and leave everything else commented out.
buildspec.yml
version: 0.2

#env:
  #variables:
     # key: "value"
     # key: "value"
  #parameter-store:
     # key: "value"
     # key: "value"

phases:
  #install:
    #commands:
      # - command
      # - command
  #pre_build:
    #commands:
      # - command
      # - command
  build:
    commands:
      - echo Hello from CodeBuild
      # - command
      # - command
  #post_build:
    #commands:
      # - command
      # - command
#artifacts:
  #files:
    # - location
    # - location
  #discard-paths: yes
  #base-directory: location
#cache:
  #paths:
    # - paths
Commit the file and push to master.
$ git add buildspec.yml
$ git commit -m "Add a buildspec.yml file"
[master dd4b5b1] Add a buildspec.yml file
 1 file changed, 37 insertions(+)
 create mode 100644 buildspec.yml

$ git push                                                                                           master
Counting objects: 3, done.
Delta compression using up to 8 threads.
Compressing objects: 100% (2/2), done.
Writing objects: 100% (3/3), 454 bytes | 454.00 KiB/s, done.
Total 3 (delta 0), reused 0 (delta 0)
To ssh://git-codecommit.us-east-1.amazonaws.com/v1/repos/my-sample-repo
   27ccb3e..dd4b5b1  master -> master
Head over to codepipeline to validate that the push event has been received.
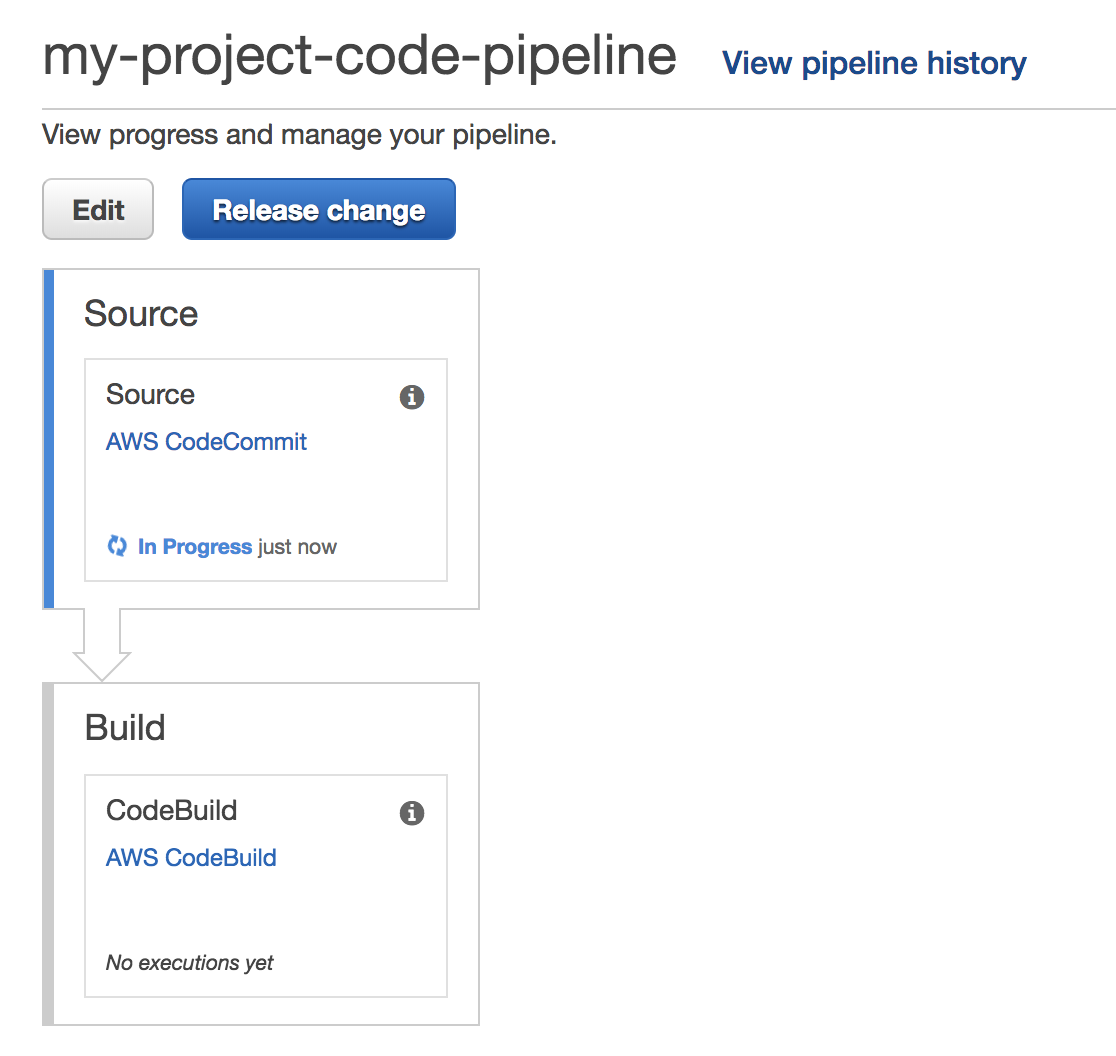
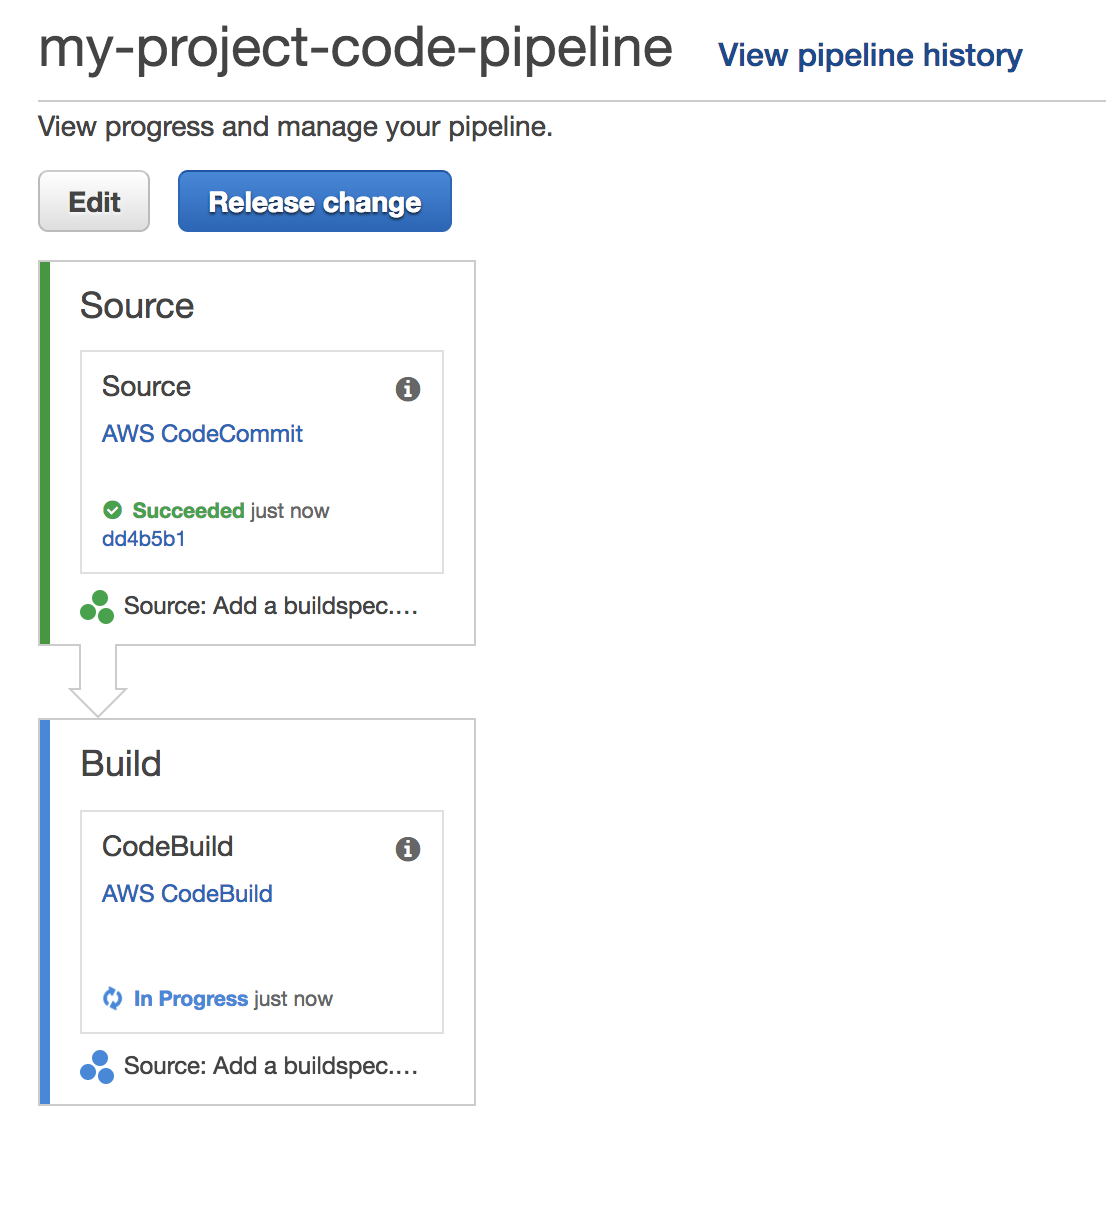
Once the Source stage has completed, the status of the Build stage should change to in progress.
Click on the AWS CodeBuild link to be redirected to the build history page. You should see the latest build for your project. Click on the build for more details. You should see a summary of the build phase outputs and a detailed log as well. Verify that the command echo Hello from CodeBuild was successfully run.
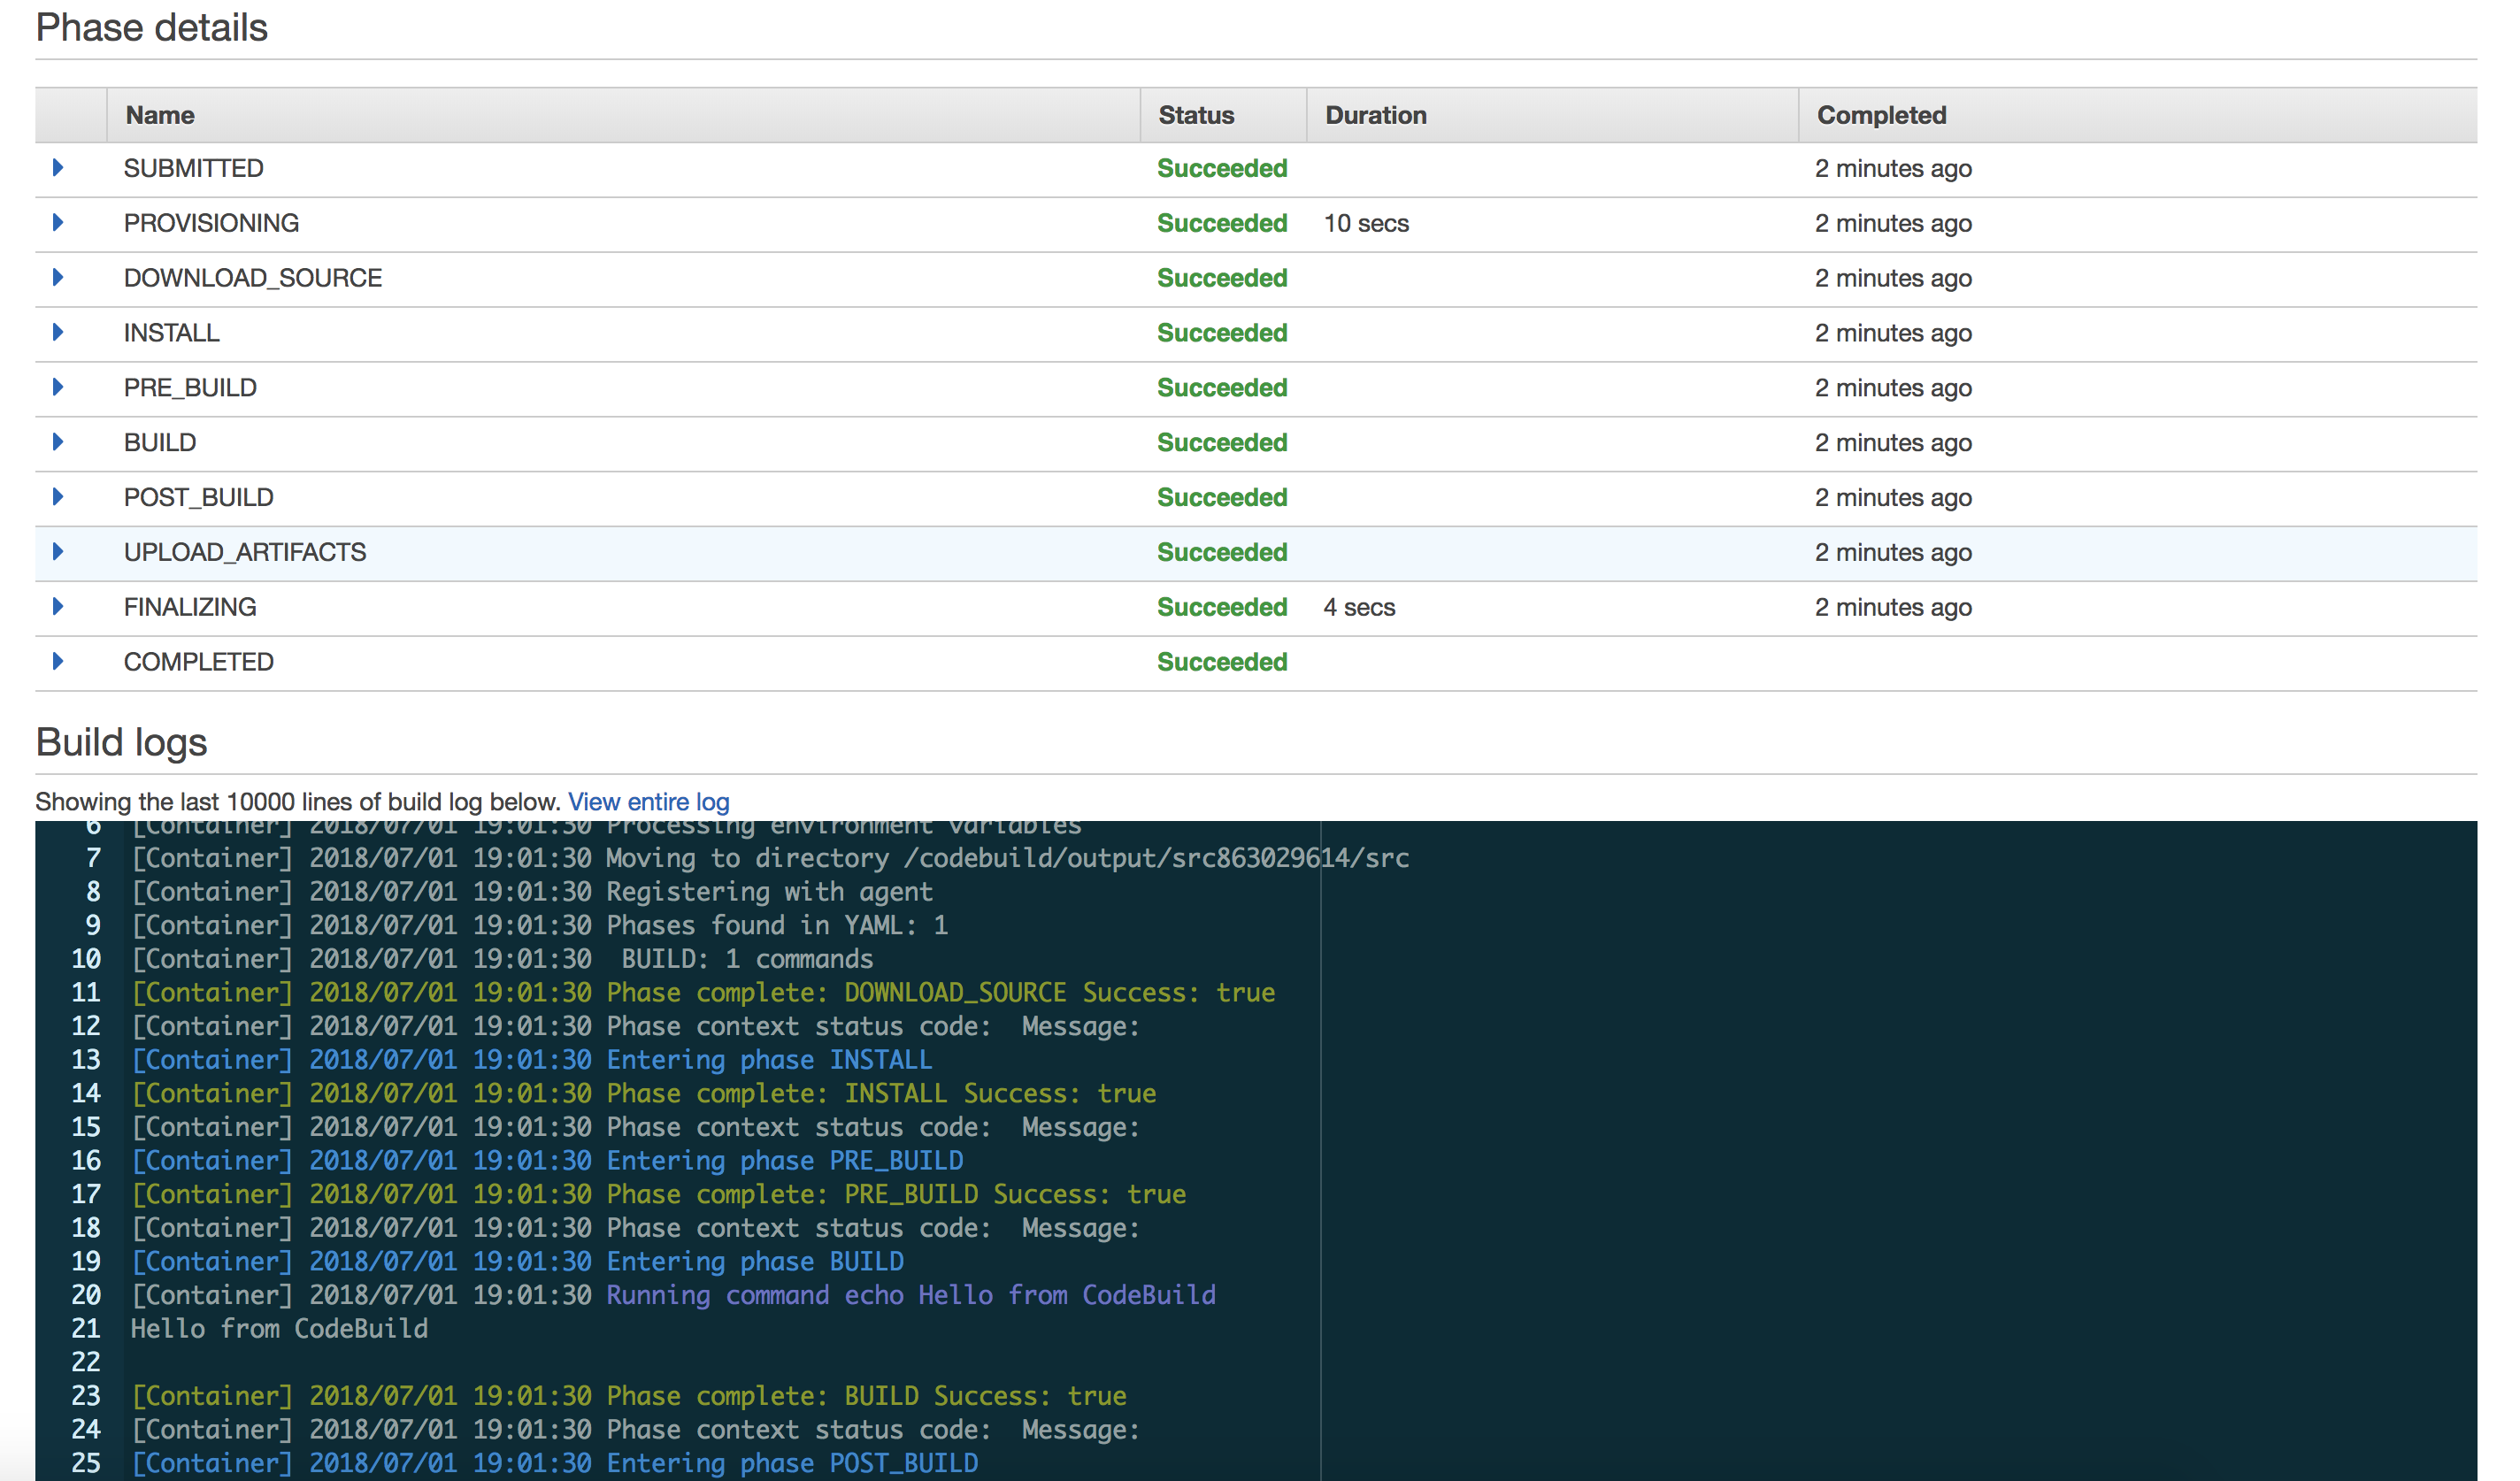
Now our builds will automatically kick off each time we push the code to the master branch, and we can easily control how we build our project simply by making changes to the buildspec.yml file.
Update the CodeBuild role policies
We need to update our build role with the proper IAM permissions in order for the build to upload code to lambda. Take note of the build role associated with your build project and head over to the IAM console.
For convenience, I’m going to attach the Amazon managed AWSLambdaFullAccess policy to our build role. In general however, Amazon recommends you provide the least amount of access that is required by your resources.
Create an S3 bucket for storing lambda code (optional)
The archive containing lambda code can either be uploaded directly to lambda or uploaded to S3 first and then referenced by lambda. The latter approach seems to be more reliable in my experience, but you can opt to skip this step and upload directly to lambda if you prefer.
To create an s3 bucket using the aws commandline
$ aws s3 mb s3://adrians-lambda-code-bucket
make_bucket: adrians-lambda-code-bucket
Create an empty lambda function
In order to update a lambda function we need to create one first.
Go to the lambda console and select Create function. Choose Python 2.7 for the runtime and create a role from template, choosing Simple Microservice Permissions as your policy template.
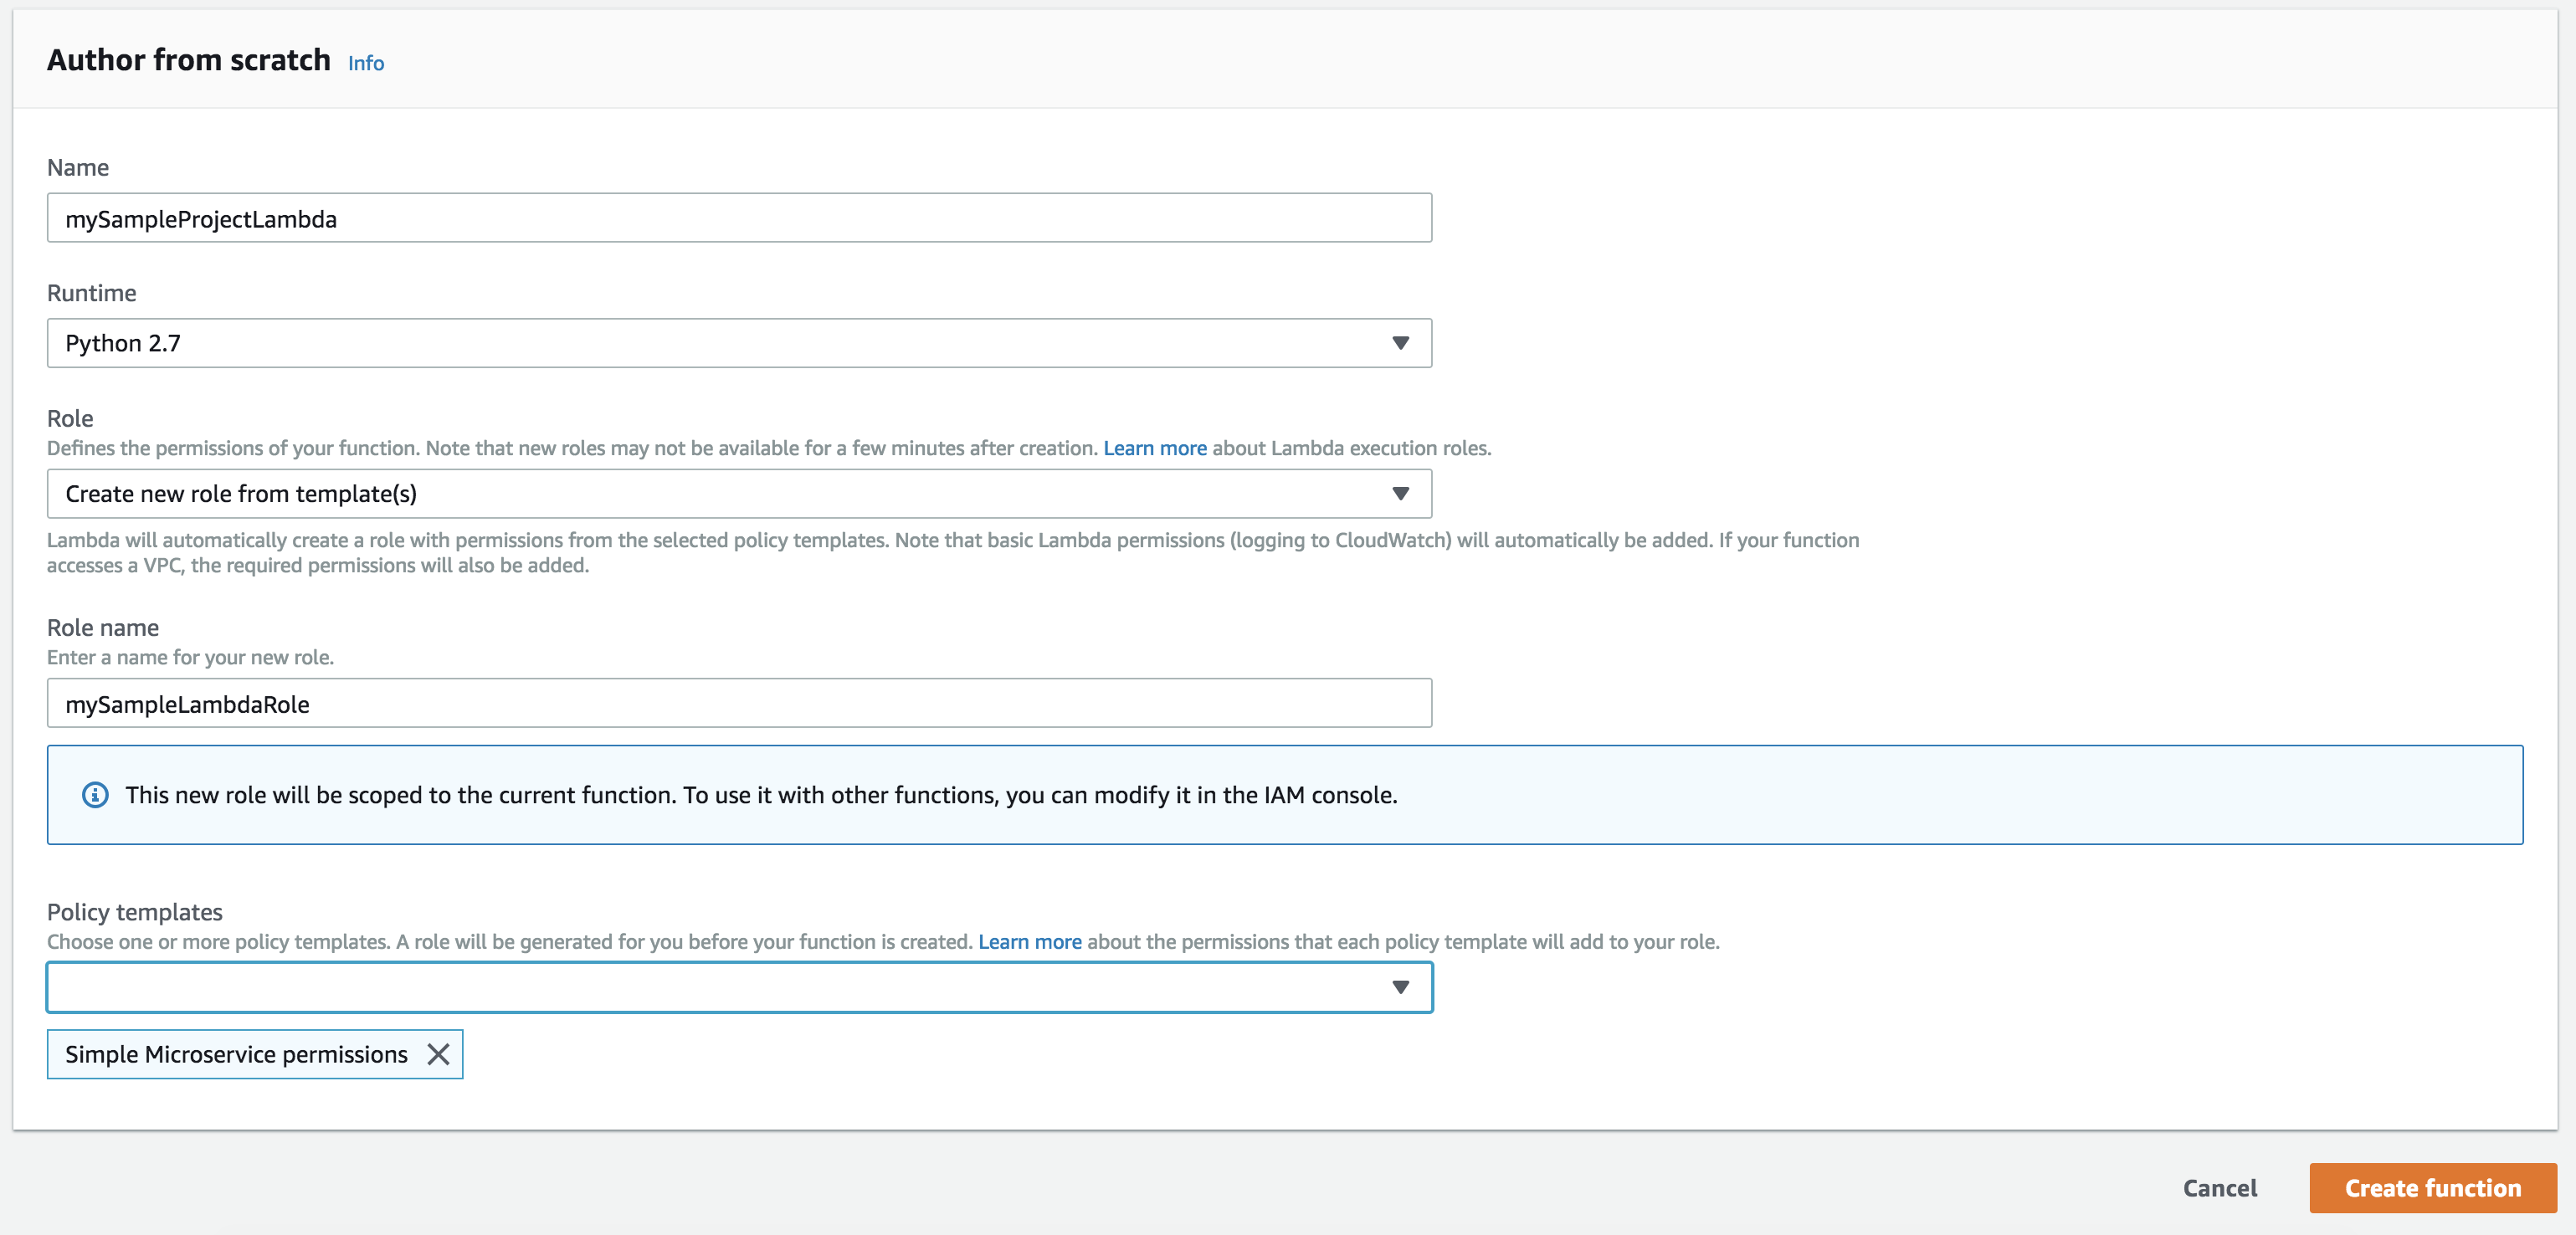
Now we will be able to update this function from the command line.
A sample Python project
Let’s define a simple project that uses some external packages. I’m going to be importing python requests since it is a common and popular choice.
First we set up our local dev environment. For this you need virtualenv, which you can install with pip install virtualenv.
$ virtualenv env
New python executable in /Users/adrian.tengamnuay/Projects/personal-projects/my-project/env/bin/python
Installing setuptools, pip, wheel...done.

$ . env/bin/activate
(env) $
Now any pip install commands we execute will be local to our project, and won’t clutter the user or global python site packages. Next, install python requests (note that your output may differ from mine).
(env) $ pip install requests
Collecting requests
  Using cached https://files.pythonhosted.org/packages/65/47/7e02164a2a3db50ed6d8a6ab1d6d60b69c4c3fdf57a284257925dfc12bda/requests-2.19.1-py2.py3-none-any.whl
Collecting certifi>=2017.4.17 (from requests)
  Using cached https://files.pythonhosted.org/packages/7c/e6/92ad559b7192d846975fc916b65f667c7b8c3a32bea7372340bfe9a15fa5/certifi-2018.4.16-py2.py3-none-any.whl
Collecting chardet<3.1.0,>=3.0.2 (from requests)
  Using cached https://files.pythonhosted.org/packages/bc/a9/01ffebfb562e4274b6487b4bb1ddec7ca55ec7510b22e4c51f14098443b8/chardet-3.0.4-py2.py3-none-any.whl
Collecting urllib3<1.24,>=1.21.1 (from requests)
  Using cached https://files.pythonhosted.org/packages/bd/c9/6fdd990019071a4a32a5e7cb78a1d92c53851ef4f56f62a3486e6a7d8ffb/urllib3-1.23-py2.py3-none-any.whl
Collecting idna<2.8,>=2.5 (from requests)
  Using cached https://files.pythonhosted.org/packages/4b/2a/0276479a4b3caeb8a8c1af2f8e4355746a97fab05a372e4a2c6a6b876165/idna-2.7-py2.py3-none-any.whl
Installing collected packages: certifi, chardet, urllib3, idna, requests
Successfully installed certifi-2018.4.16 chardet-3.0.4 idna-2.7 requests-2.19.1 urllib3-1.23
We’re going to create a requirements.txt file with our requirements so that codebuild (or anyone else who wants to work on this project) can exactly replicate the development environment, without having to check in dependent packages into source.
(env) $ pip freeze > requirements.txt
requirements.txt
certifi==2018.4.16
chardet==3.0.4
idna==2.7
requests==2.19.1
urllib3==1.23
Important: Make sure to update your requirements.txt file whenever you add or remove packages from your project.
Here’s a simple lambda handler which makes use of the requests library. I like to add the main function so I can test locally.
lambda_function.py
import requests

def lambda_handler(event, context):
  res = requests.get('https://google.com')
  print res.text
  return res.text

if __name__ == '__main__':
  lambda_handler(None, None)
Let’s also add a .gitignore file to ignore the virtual environment folder, and any compiled python files.
.gitignore
env
*.pyc
The last thing for us to do is update our buildspec.yml file which will tell codebuild how to build our project and deploy it to lambda. Take a look and review the new build spec.
buildspec.yml
version: 0.2
env:
  variables:
    LAMBDA_NAME: "my-project-lambda"
    BUCKET_NAME: "adrians-lambda-code-bucket"
phases:
  install:
    commands:
      - apt-get update
      - apt-get install zip
  pre_build:
    commands:
      - pip install virtualenv
      - virtualenv env
      - . env/bin/activate
      - pip install -r requirements.txt
  build:
    commands:
      - ISO_DATE=$(date +%Y-%m-%dT%H:%M:%S%z)
      - TMP_DIR="dist-$ISO_DATE"
      - mkdir $TMP_DIR
      - cp *.py $TMP_DIR
      - cp -rf env/lib/python2.7/site-packages/* $TMP_DIR
      - cd $TMP_DIR; zip -r ../dist.zip *
      - cd ..
      - aws s3 cp dist.zip s3://$BUCKET_NAME/$LAMBDA_NAME/dist.zip
      - aws lambda update-function-code --function-name $LAMBDA_NAME --s3-bucket $BUCKET_NAME --s3-key $LAMBDA_NAME/dist.zip --publish
The build spec first installs the zip utility, and then installs the python packages to a virtual environment specified by requirements.txt.
During the build phase, a temporary folder named something like dist-2018-07-01T19:25:13-0700 is created. The python files and installed packages are copied over to this folder. These files are then zipped into the dist.zip archive and the folder is removed.
Finally, the zip file containing our lambda code is uploaded to S3, and we update and publish our new lambda function by passing in the S3 location.
If you did not create an S3 bucket for storing your lambda code, you can upload the zip file directly to lambda by replacing the last two AWS commands with
- aws lambda update-function-code --function-name $LAMBDA_NAME --zip-file fileb://dist.zip --publish
Now push the changes and cross your fingers…
(env) $ git add .
(env) $ git commit -m "A sample python lambda function"
[master 3a9bc2d] A sample python lambda function
 4 files changed, 40 insertions(+), 37 deletions(-)
 create mode 100644 .gitignore
 rewrite buildspec.yml (92%)
 create mode 100644 lambda_function.py
 create mode 100644 requirements.txt

(env) $ git push
Counting objects: 6, done.
Delta compression using up to 8 threads.
Compressing objects: 100% (5/5), done.
Writing objects: 100% (6/6), 948 bytes | 948.00 KiB/s, done.
Total 6 (delta 0), reused 0 (delta 0)
To ssh://git-codecommit.us-east-1.amazonaws.com/v1/repos/my-sample-repo
   c8f5ea5..3a9bc2d  master -> master
This will kick off the build which, if everything goes successfully, will automatically update and publish your new lambda code.
Test out your lambda function using the invoke command.
$ aws lambda invoke --function-name my-project-lambda response.txt
{
  "ExecutedVersion": "$LATEST",
  "StatusCode": 200
}

$ cat response.txt
"<!doctype html><html itemscope=\"\" itemtype=\"http://schema.org/WebPage\" lang=\"en\"><head><meta content=\"Search the world's information ...
Conclusion
So there you have it, a continuous deployment process for python projects running on AWS lambda. I’m currently using the same setup for one of my own personal projects, and it works great.
One thought I had was how can we incorporate cloudformation into this sort of continuous deploy pipeline.
Cloud formation manages AWS resources through a yaml file similar to the buildspec.yml used by CodeBuild, but where buildspec.yml has an imperative structure, cloudformation templates have a declarative one. This means that for buildspec.yml we list out each of steps that we want run, but in a cloudformation template, we simply list each resource and the state we’d like it to be in. AWS then executes whatever steps are necessary to get those resources to the requested states.
Something to look into next time. I hope you enjoyed this tutorial, please let me know what you think in the comments below.
Happy coding!