Getting started with AWS Lambda Functions
20 October 2019AWS Lambda is Amazon’s function as a service product. It’s a service that lets you package and run code without having to provision or manage servers. With Lambda, you only pay when your code is running. By contrast, you pay for managed servers like EC2 as long as they are running, even while they are not serving any requests.
To begin with AWS Lambda, you first write some code in one of the supported languages, you package and upload this code to Lambda, and now you have a Lambda function that can be run on demand. The Lambda function can be triggered from other AWS services such as SNS, SQS, API Gateway, and Cloudwatch events. Another benefit of Lambda is that it scales automatically based on the number of requests.
In this tutorial, I’ll go over how to create and manage a Lambda function, as well as how to trigger the lambda function from different event sources. This tutorial assumes you know how to write some very basic code and are familiar with the AWS Console.
Create a Lambda Function
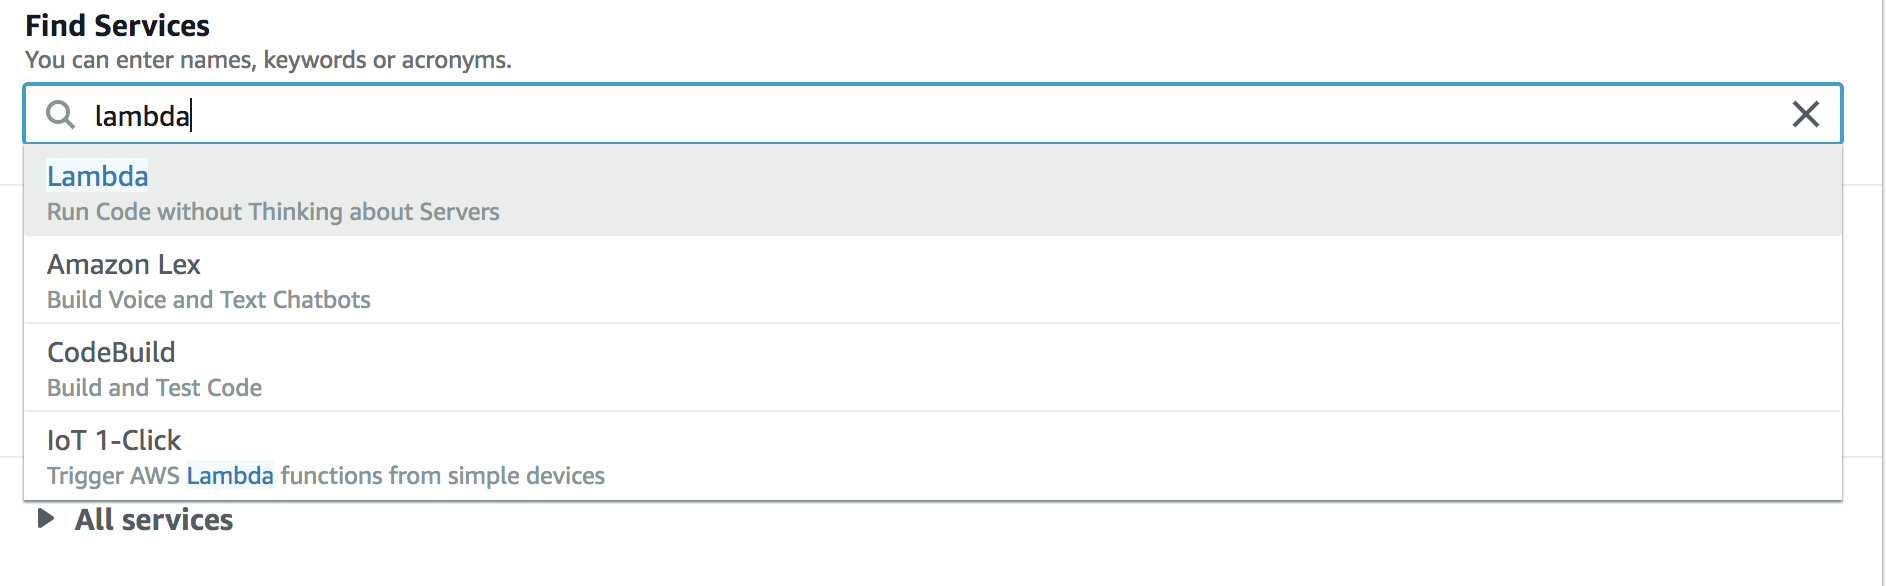
Let’s start by creating a simple Lambda function. Navigate to the AWS Console and search for “Lambda”.
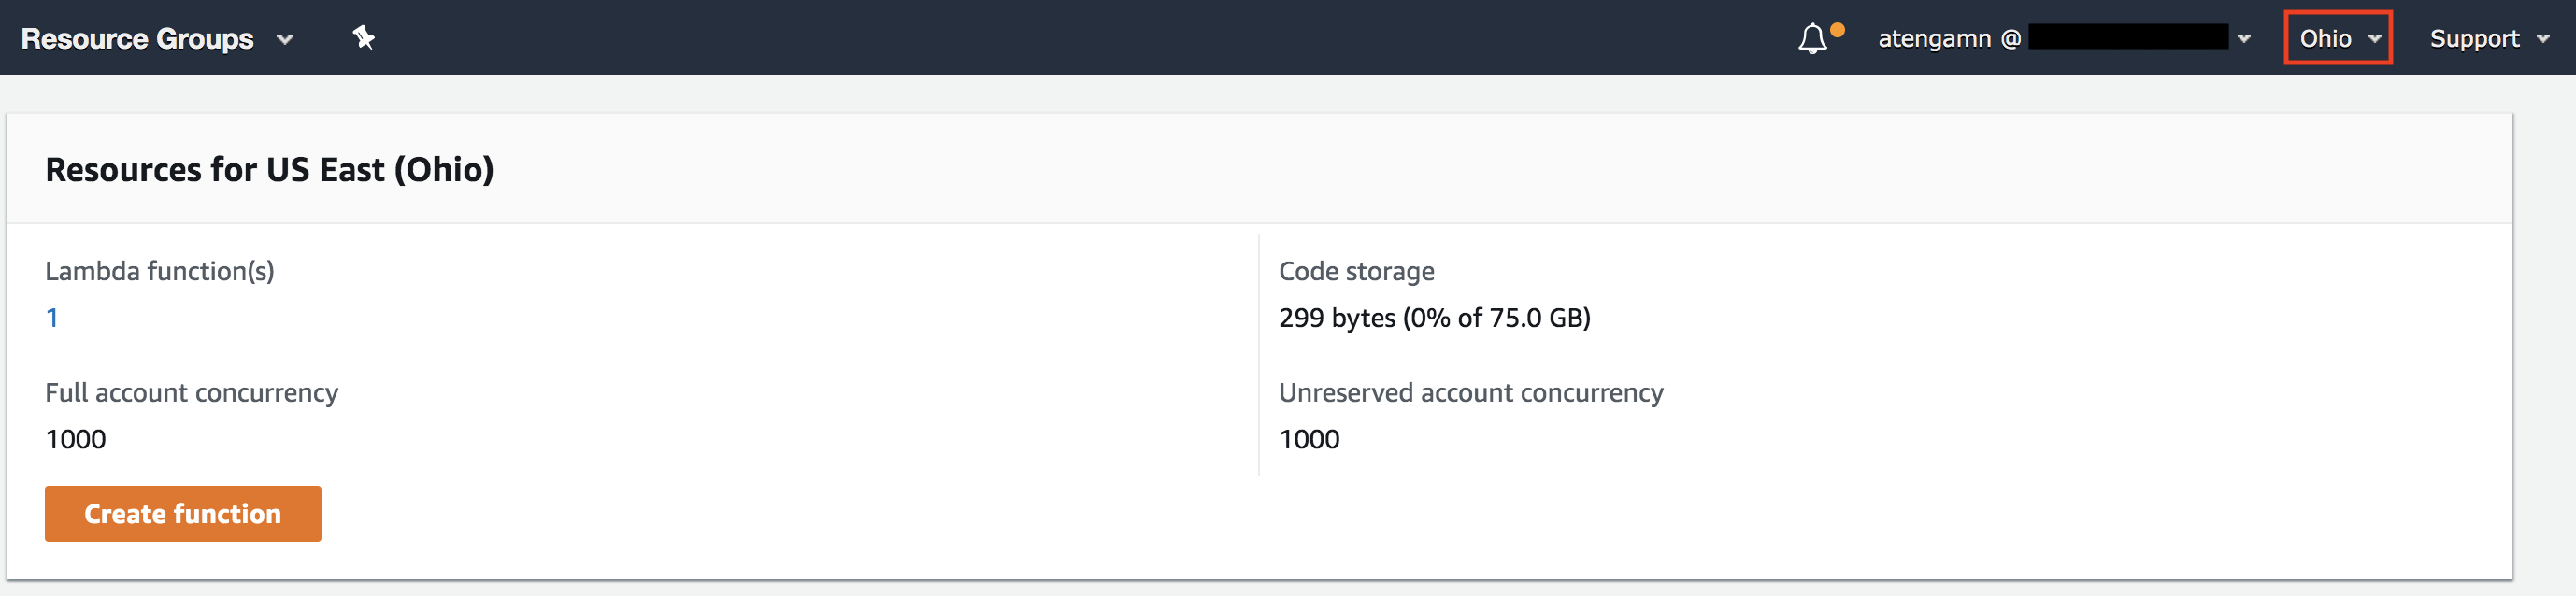
Please make a note of the region in which you create your lambda function. AWS resources are generally tied to a specific region and Lambda is no exception.
Next select the Create function button.

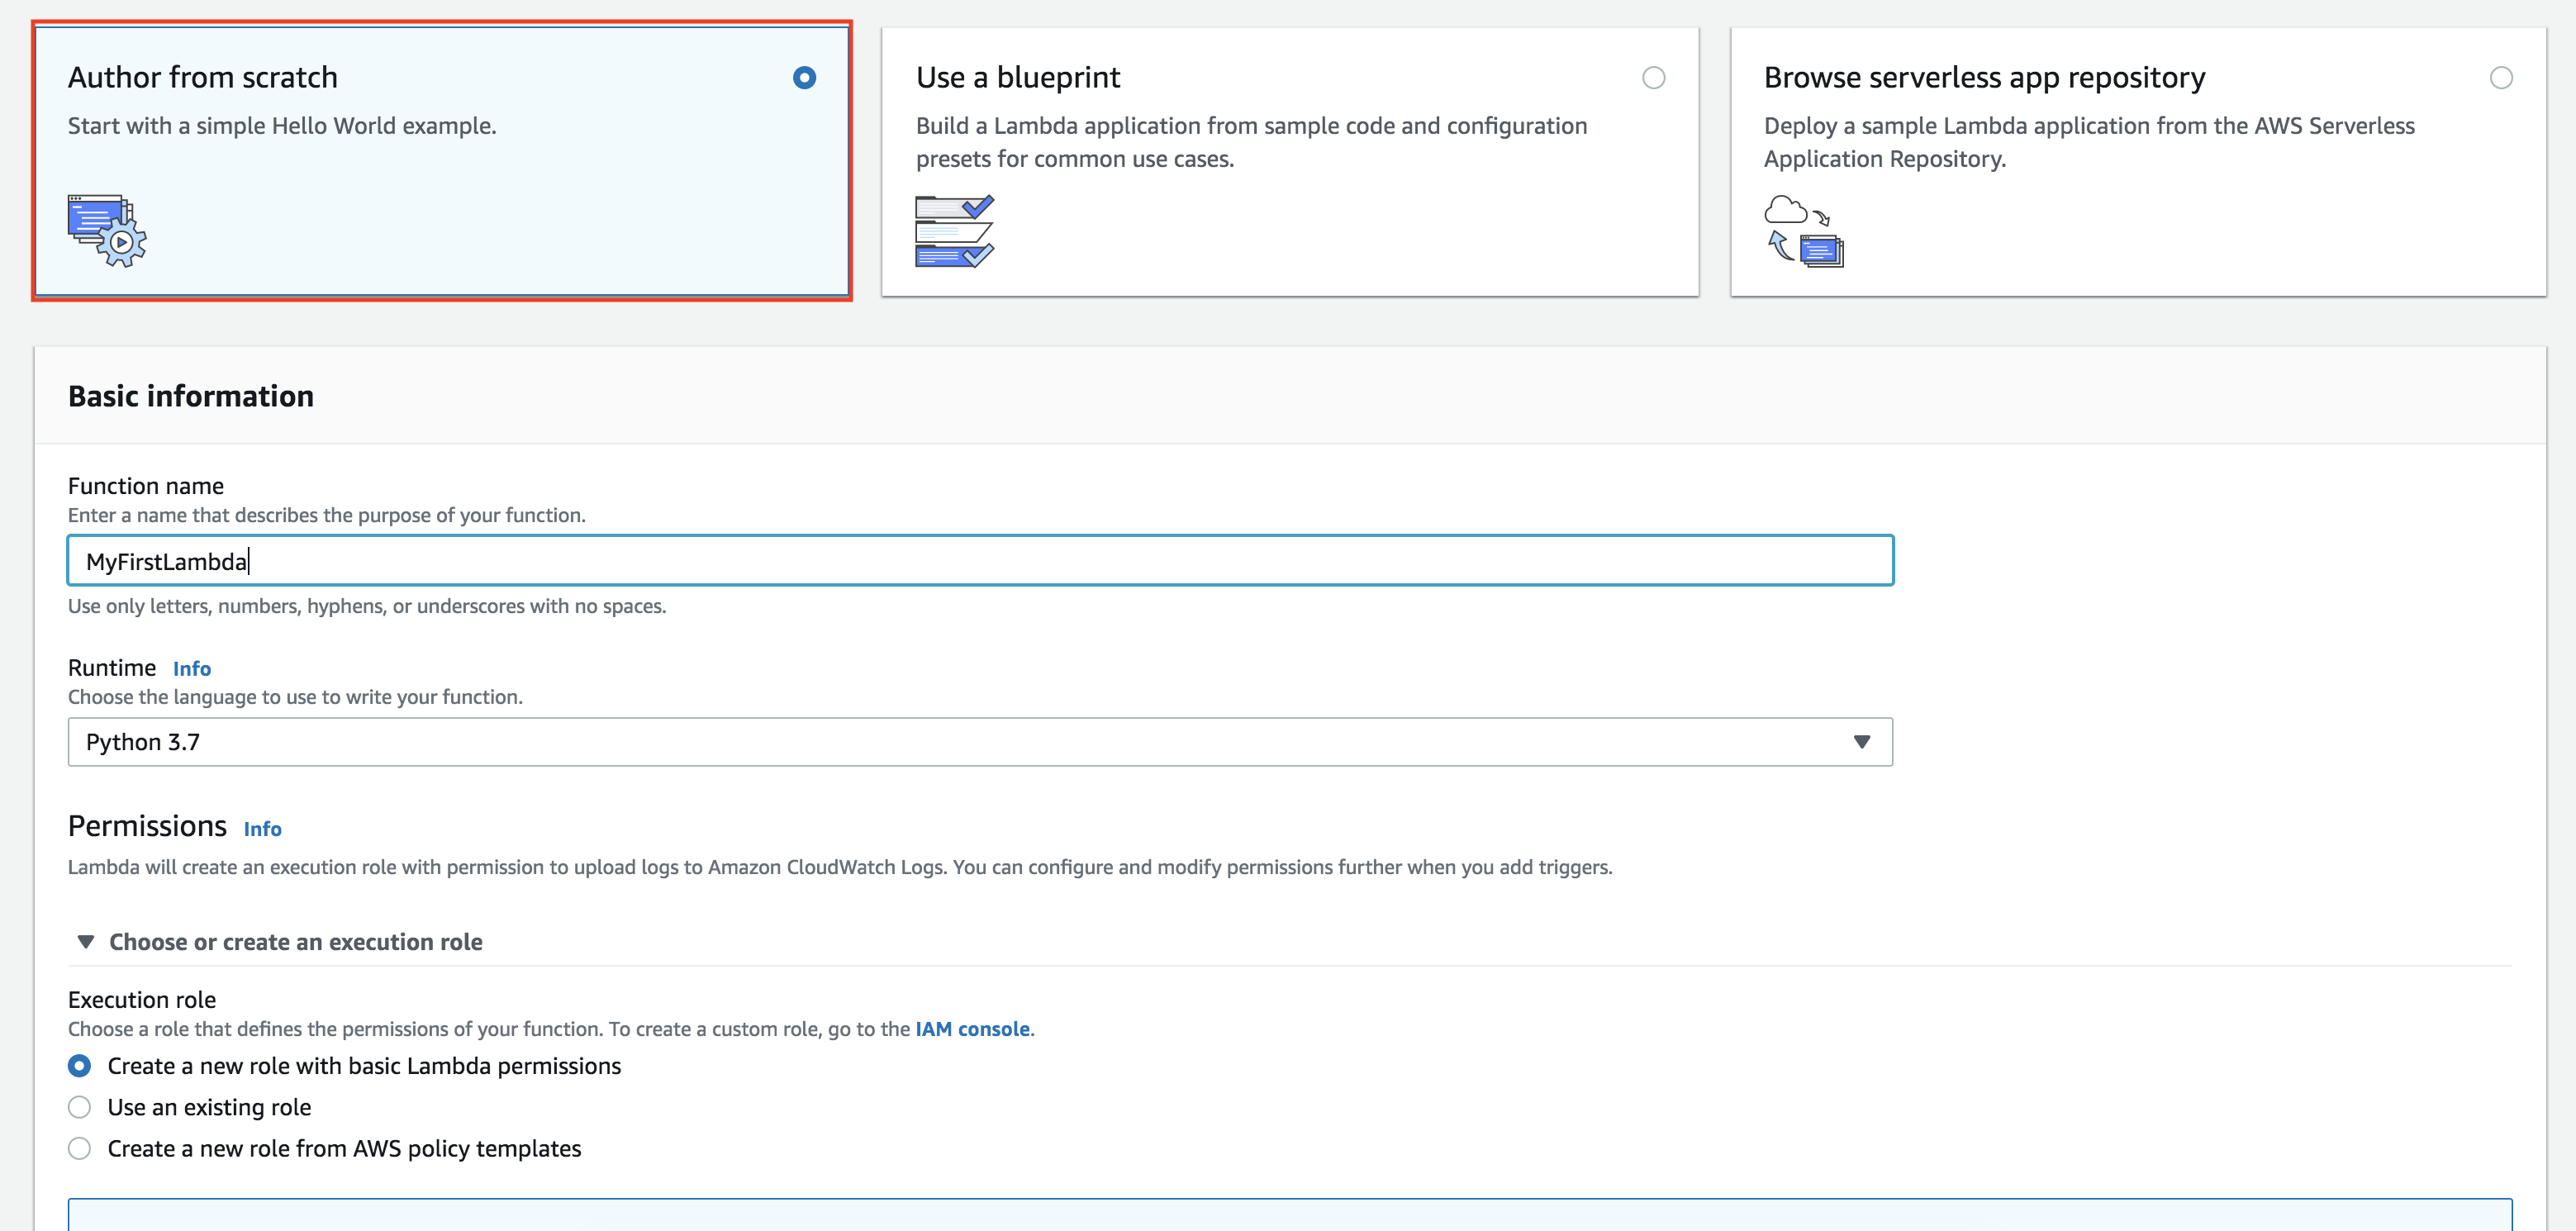
In this tutorial we’ll be selecting Author from Scratch.
Other options include Use a blueprint which lets you browse the repository of Lambda functions to use as a starter template, and Serverless App repository. The Serverless App repository contains CloudFormation templates which often define, in addition to one or more Lambda functions, a group of AWS resources to create. CloudFormation is outside the scope of this tutorial.
Fill out the form by giving your function a name and selecting the runtime language of your choice. For the execution role, we’ll create a new one with basic permissions.
An execution role is an IAM Role that the Lambda function assumes whenever it runs. This role has permissions tied to it so you can limit the scope of what the lambda function does. There are three options:
- Create a new role with basic Lambda permissions: Lambda creates a new IAM role with minimal permissions, ie. ability to send CloudWatch logs, for your Lambda. This is the one we’ve chosen for convenience.
- Use an existing role: Select a role which already exists.
- Create a new role from AWS policy templates: Creates an IAM role from several cookie-cutter policy templates.
Click Create function and wait for the lambda function to be created.
Getting to know the UI
The Designer
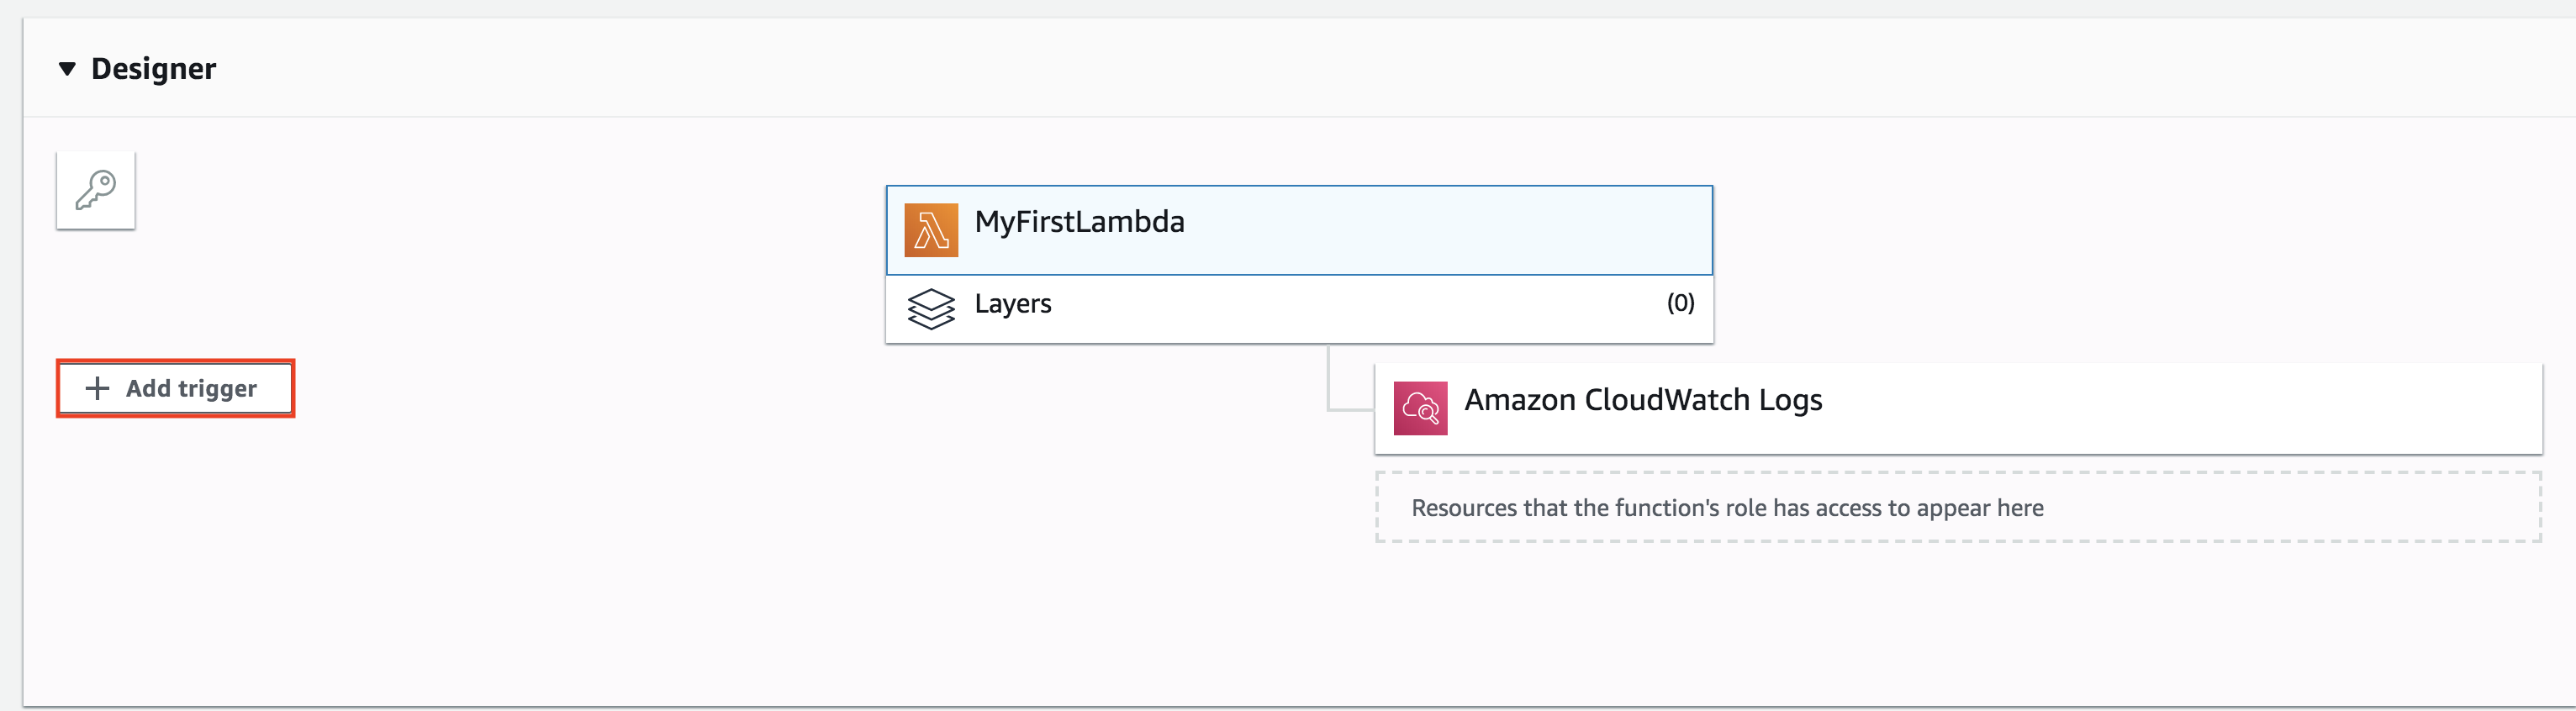
Once your Lambda function has been created, you should be redirected to the the following page. The designer section gives you a visualization of Triggers on the left, which are events that can trigger your lambda function to run, and services that your Lambda function has permission to interact with on the right.
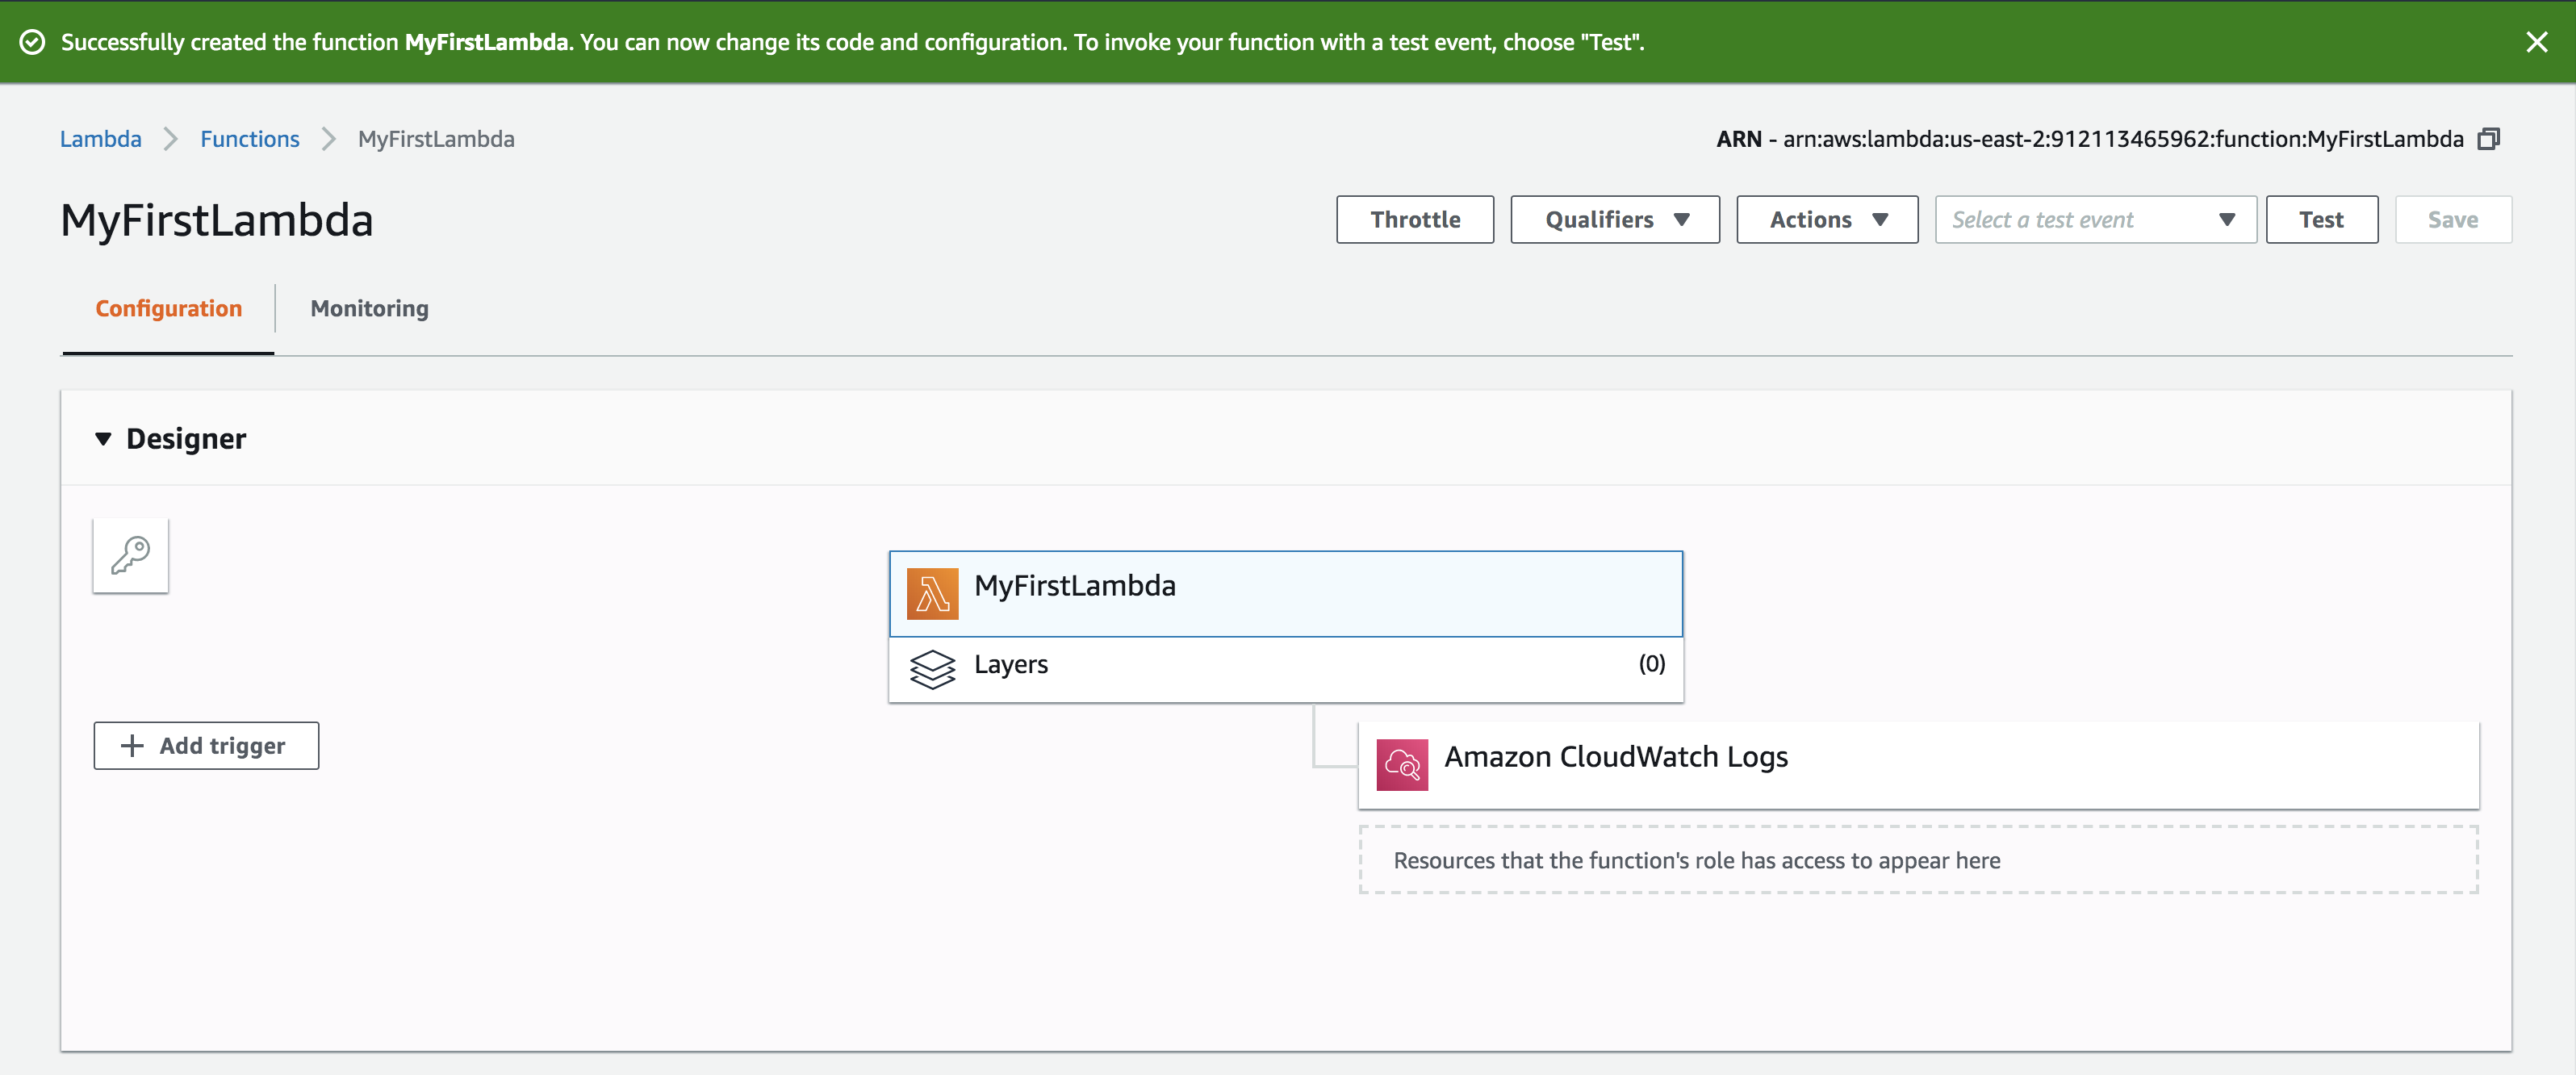
In this case, our Lambda function currently has no associated triggers, and only has permission to send logs to Cloudwatch. The services that your Lambda function has permission to interact with, is defined by the IAM role that was associated with it during creation time. The Lambda function’s execution role can be updated even after the Lambda function is created. It can also be replaced with a different role.
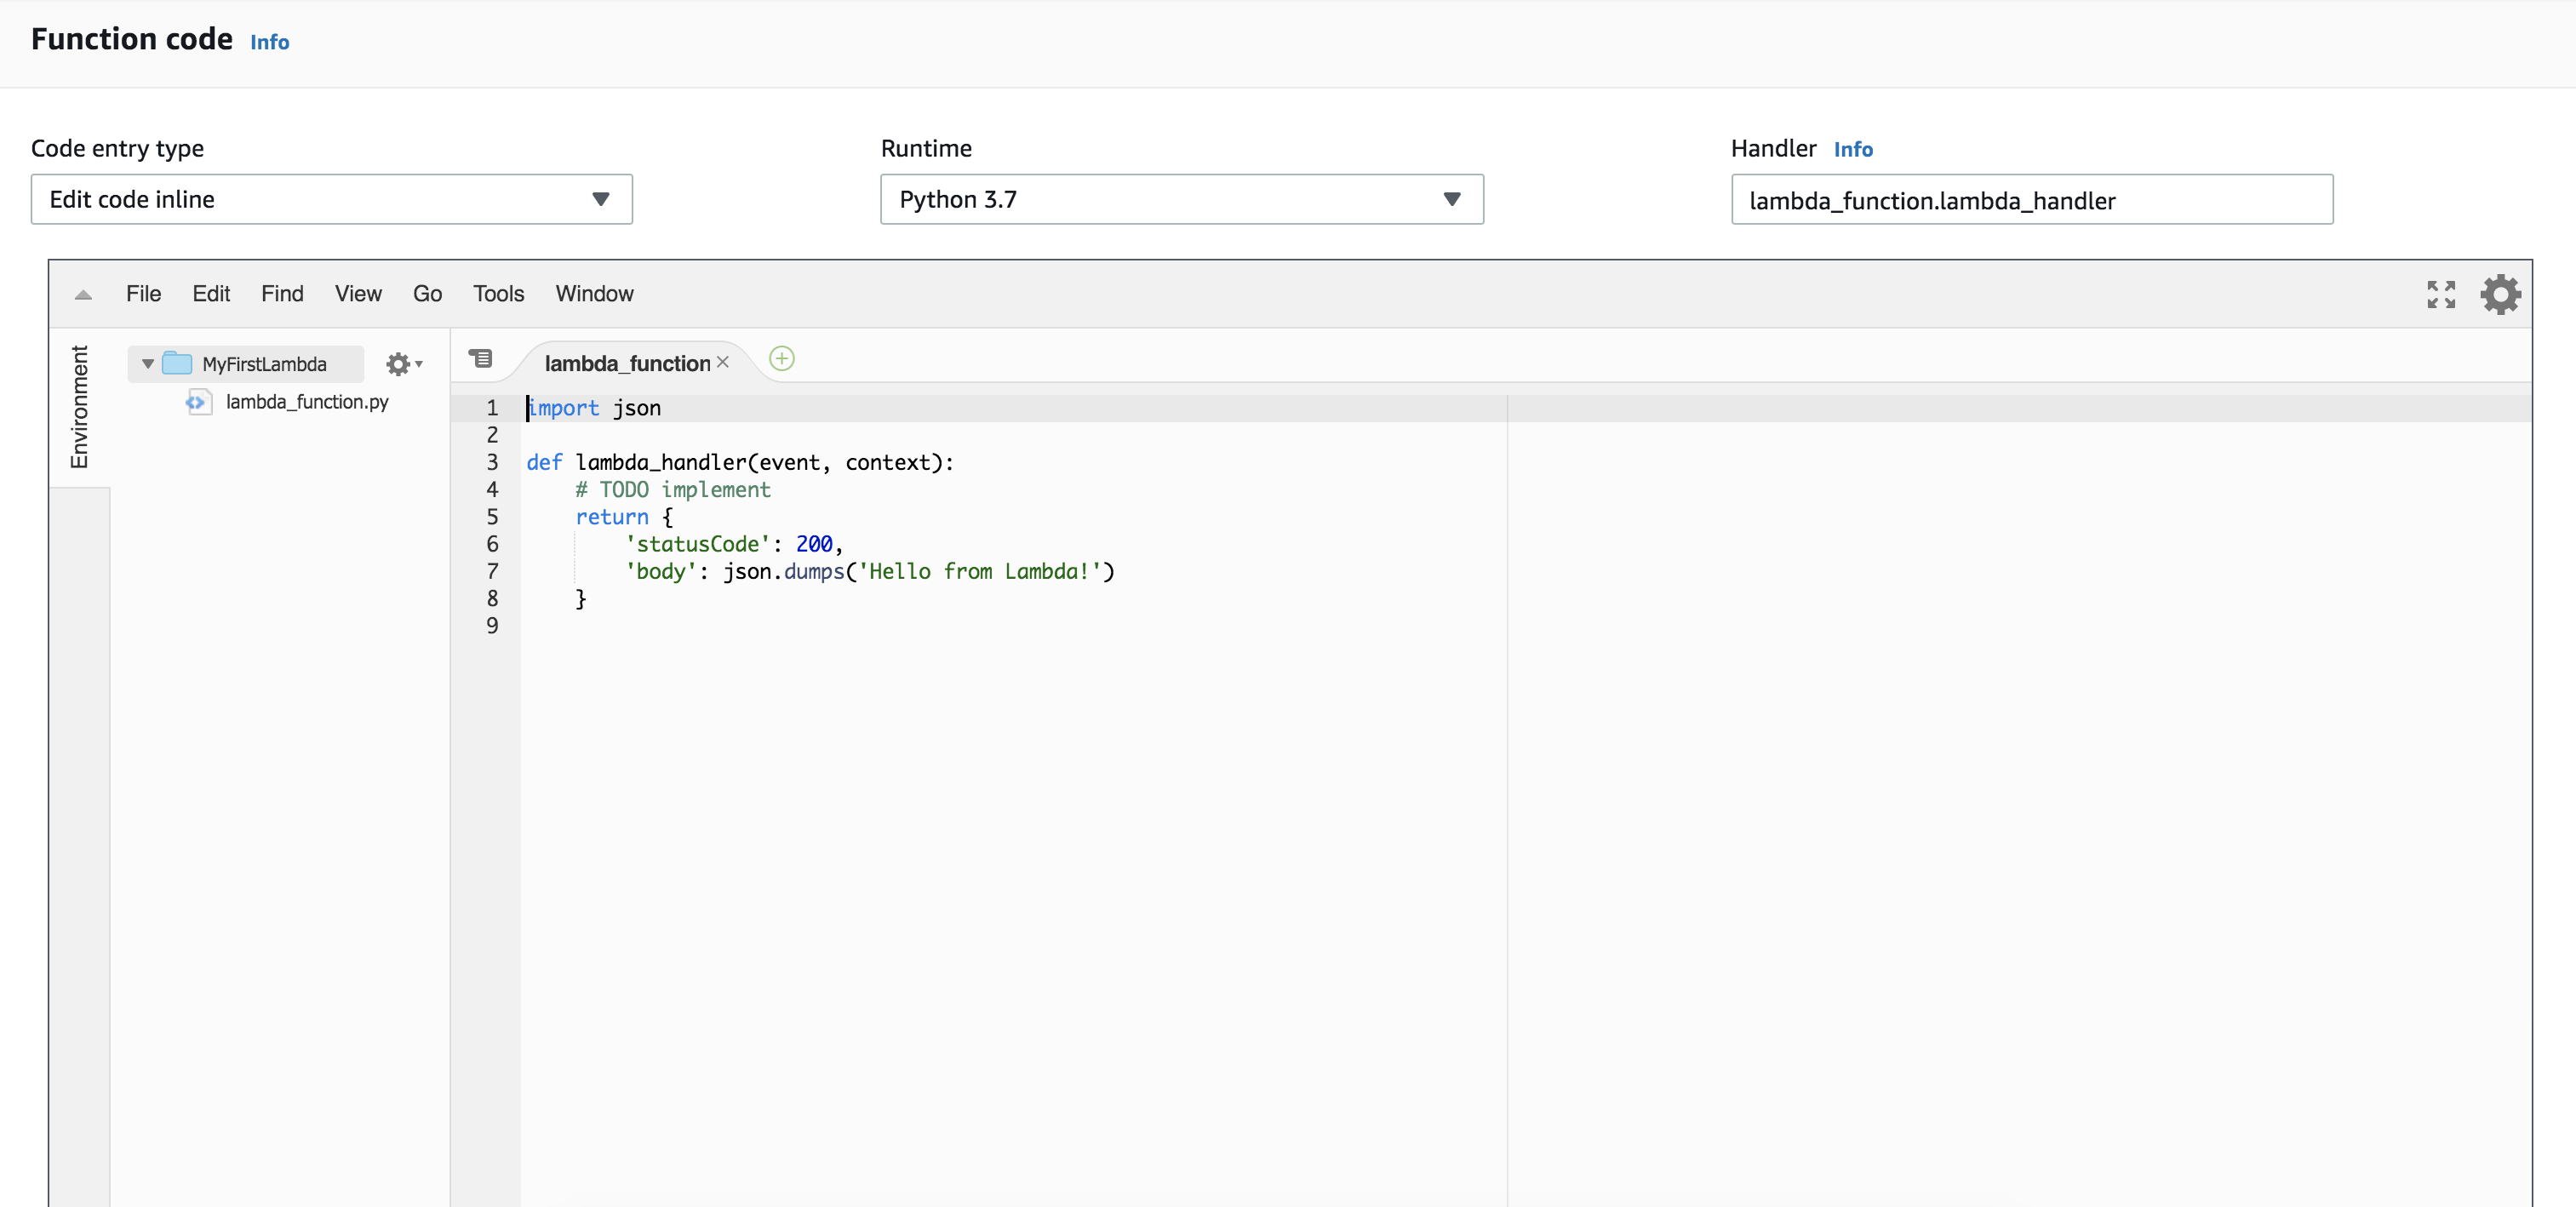
The In-browser code editor
Lambda supports an in-browser code editor for convenience. You can update code, save your changes, and test them out as you go. While the in-browser editor is convenient for trying out Lambda, or working with smaller functions, it’s not recommended for larger projects because there are limitations around deployment package size.
Test the function
Create a test event
Our lambda has already been set up to return an object with statusCode: 200 and body: “Hello from Lambda!”, so let’s try running it manually. Click on the Test button on the Lambda navigation bar.

This will open up a form where you can manage and create test events. When your lambda function runs, the event’s contents are passed to the event argument in your lambda function’s handler.
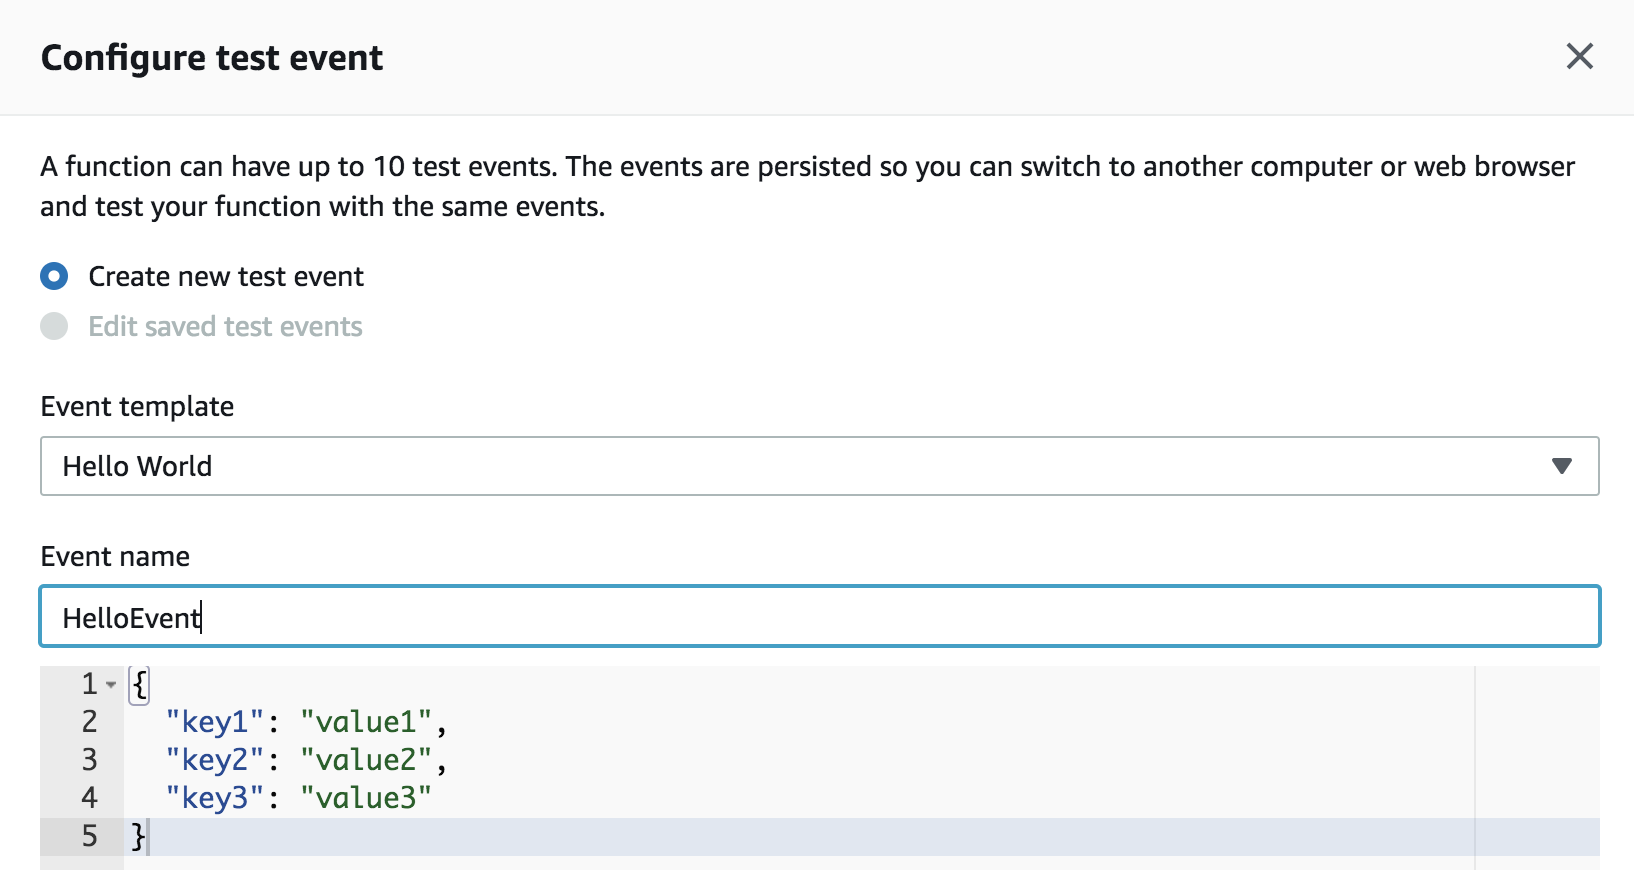
Every service that triggers Lambda passes the event argument with relevant information. For example if a Cloudwatch metric triggered your function, it would pass the metric value and threshold that caused the event to trigger. In this way, test events can be used to simulate different events, and you can test that your Lambda function behaves correctly in each scenario.
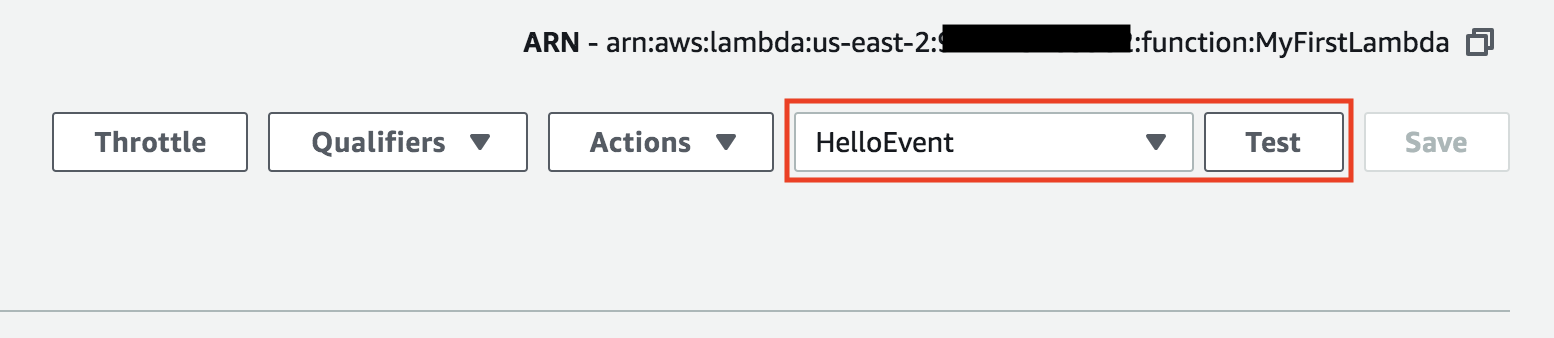
Trigger the test event
Once you’ve created the test HelloEvent, we can now trigger the lambda function with it. Make sure HelloEvent is selected and click Test.
View the log output
You should see that the lambda function executed and succeeded. You can view the logs by expanding the execution details at the top. Clicking logs will take you to the Cloudwatch dashboard where you can view historical logs across multiple runs of your Lambda function.
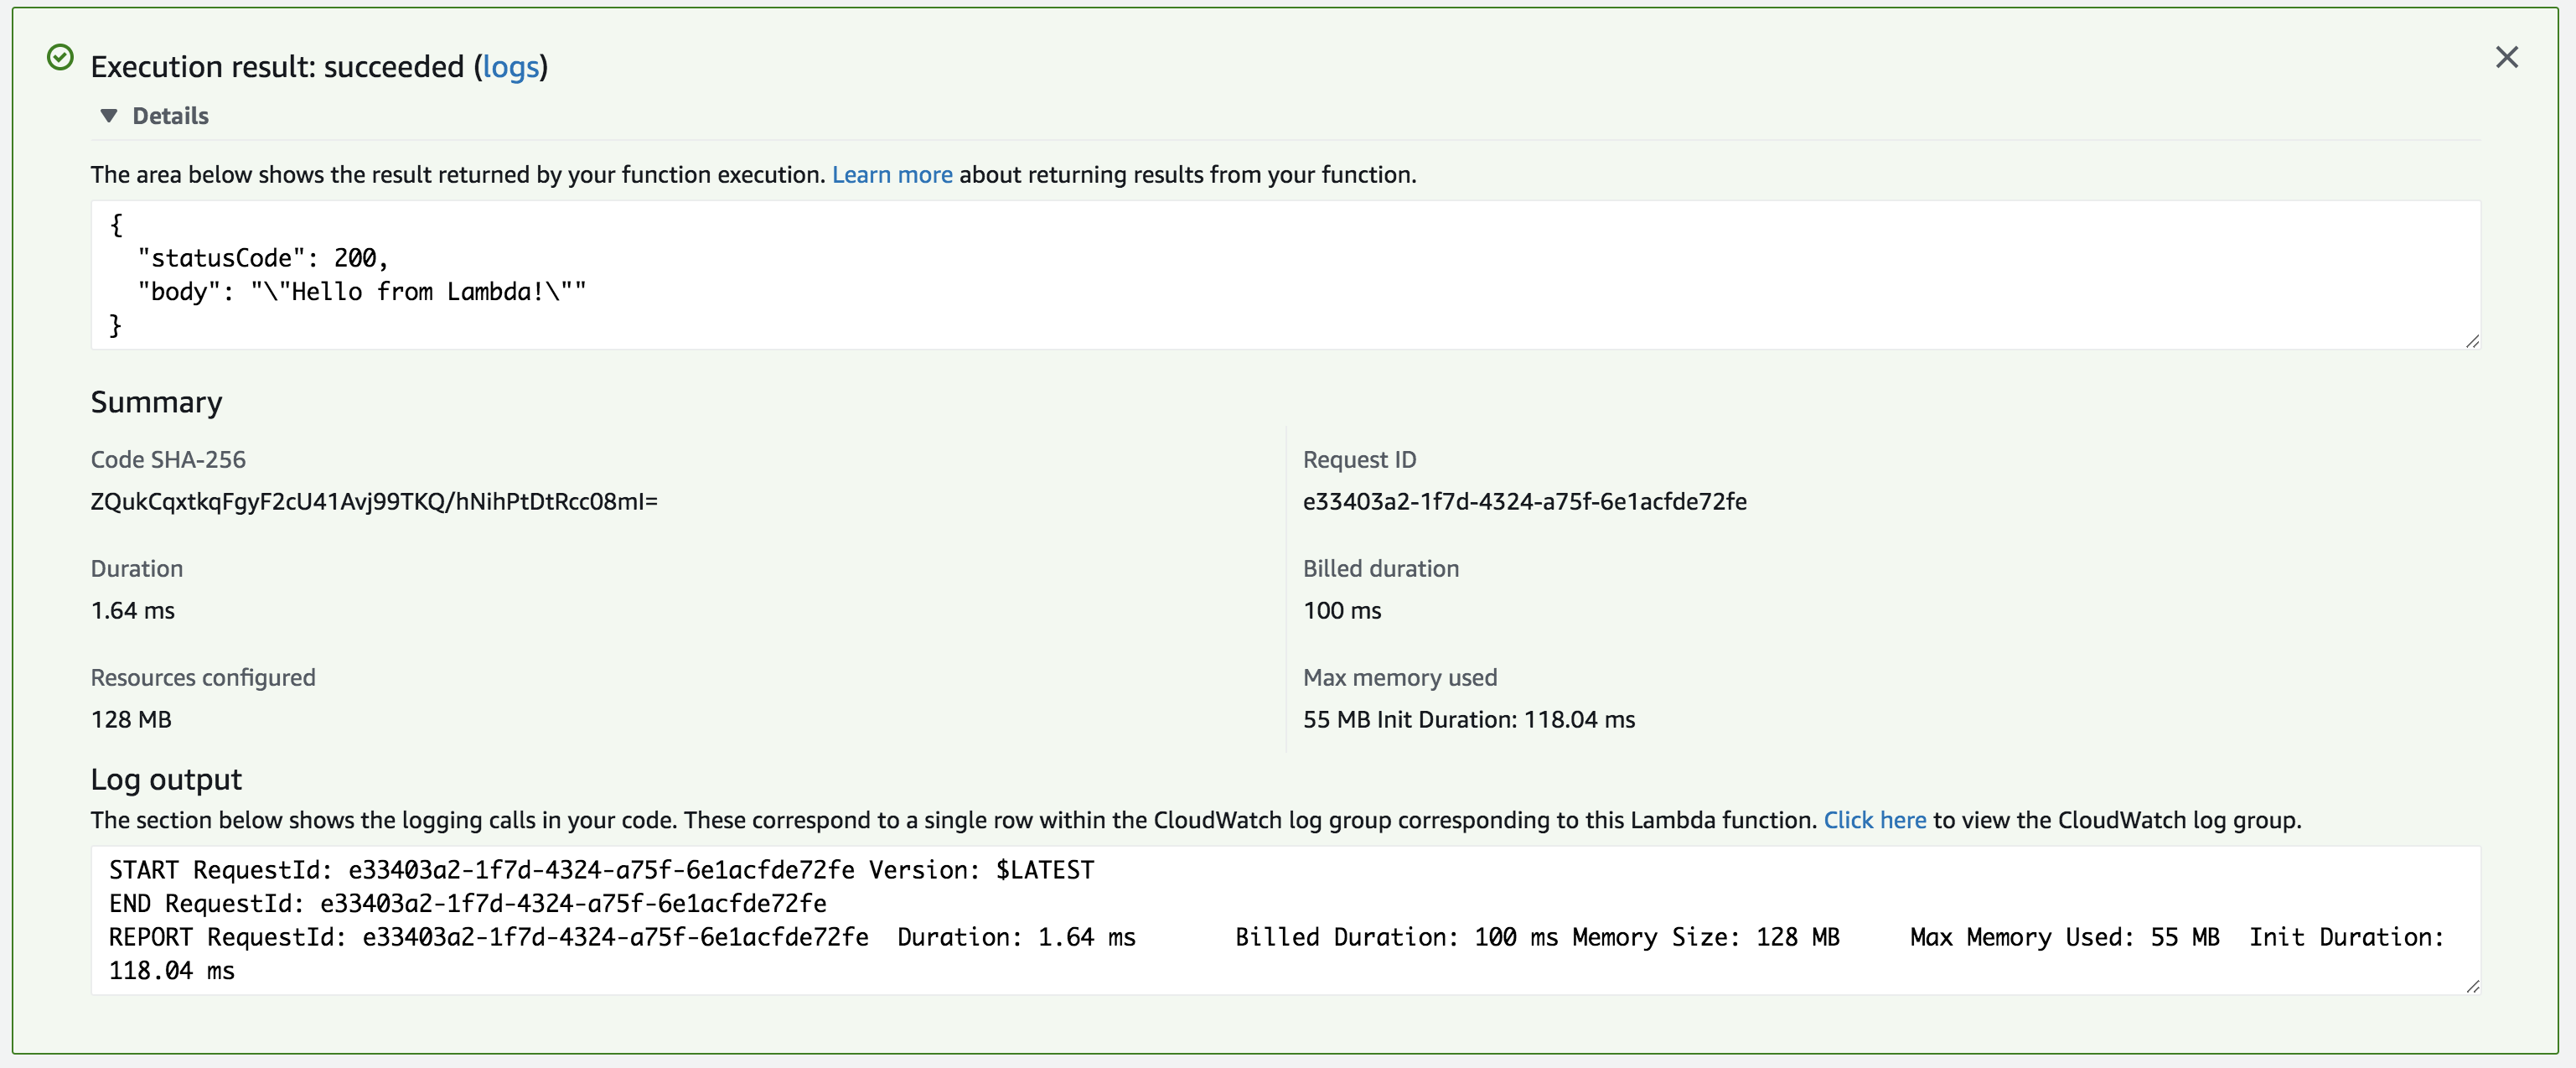
You can also view logs in the editor’s results section.

Print out the event
Let’s update the Lambda function to print out the argument event. Update the function code like
import json

def lambda_handler(event, context):
    print("Event: {}".format(event))  # Add this line
    return {
        'statusCode': 200,
        'body': json.dumps('Hello from Lambda!')
    }
Click Save and run the function again with the HelloEvent test event. You should now see the event being printed out in the log output.
START RequestId: 9a14a9d0-e6a4-4761-aeb6-e572ef6971e7 Version: $LATEST
Event: {'key1': 'value1', 'key2': 'value2', 'key3': 'value3'}
END RequestId: 9a14a9d0-e6a4-4761-aeb6-e572ef6971e7
REPORT RequestId: 9a14a9d0-e6a4-4761-aeb6-e572ef6971e7	Duration: 19.07 ms	Billed Duration: 100 ms	Memory Size: 128 MB	Max Memory Used: 56 MB	Init Duration: 108.39 ms
Environtment Variables
Environment variables are useful for parameterizing things like database connection strings, Arn references to other AWS resources, environment specific settings, or really anything you want to control without having to make code changes and redeploy your function.
Basic Settings
I’ll be skipping over a few of the other sections but I wanted to make sure to cover the Basic Settings section.
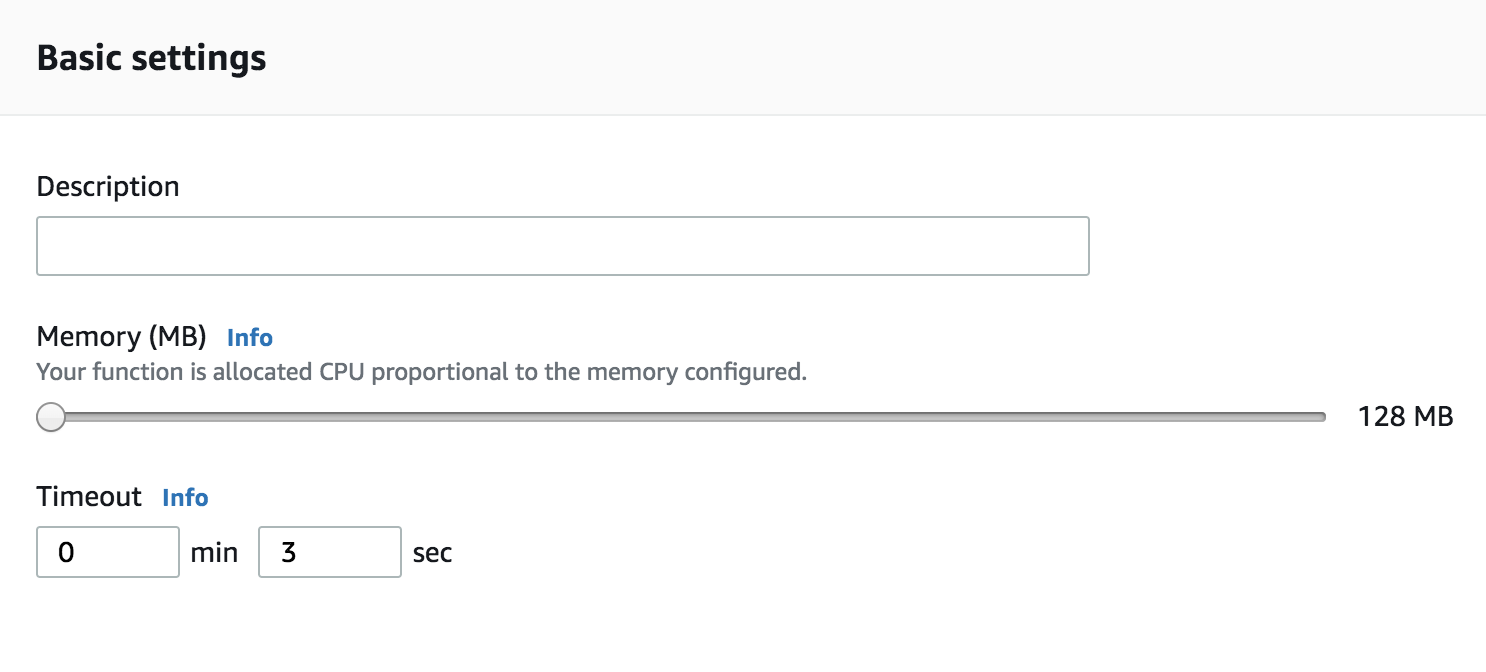
In this section you define how much Memory your Lambda function requires. It receives CPU proportional to the amount of memory that you choose. You also specify a Timeout, which is used by Amazon to kill your function if it hasn’t finished processing within the set timeout.
These fields are relevant because with Lambda, you are billed either by how many executions or by how many GB-seconds you use per month. For more information on pricing, see https://aws.amazon.com/lambda/pricing/. And don’t worry, at the time of writing, this tutorial qualifies under the free-tier.
Triggers
Now that we have a basic understanding of Lambda and a working function, let’s try attaching a few different triggers to automatically kick off a function execution instead of manually triggering it with a TestEvent.
Cloudwatch Scheduled Event
Cloudwatch scheduled events are one of the simplest types of triggers. A cloudwatch scheduled event, as the name implies, simply triggers on a preset schedule. Let’s start by creating a simple cloudwatch scheduled event that triggers our function once a day.
In the Designer section, click Add Trigger.
Next, select CloudWatch Events from the dropdown and fill in the form like so:
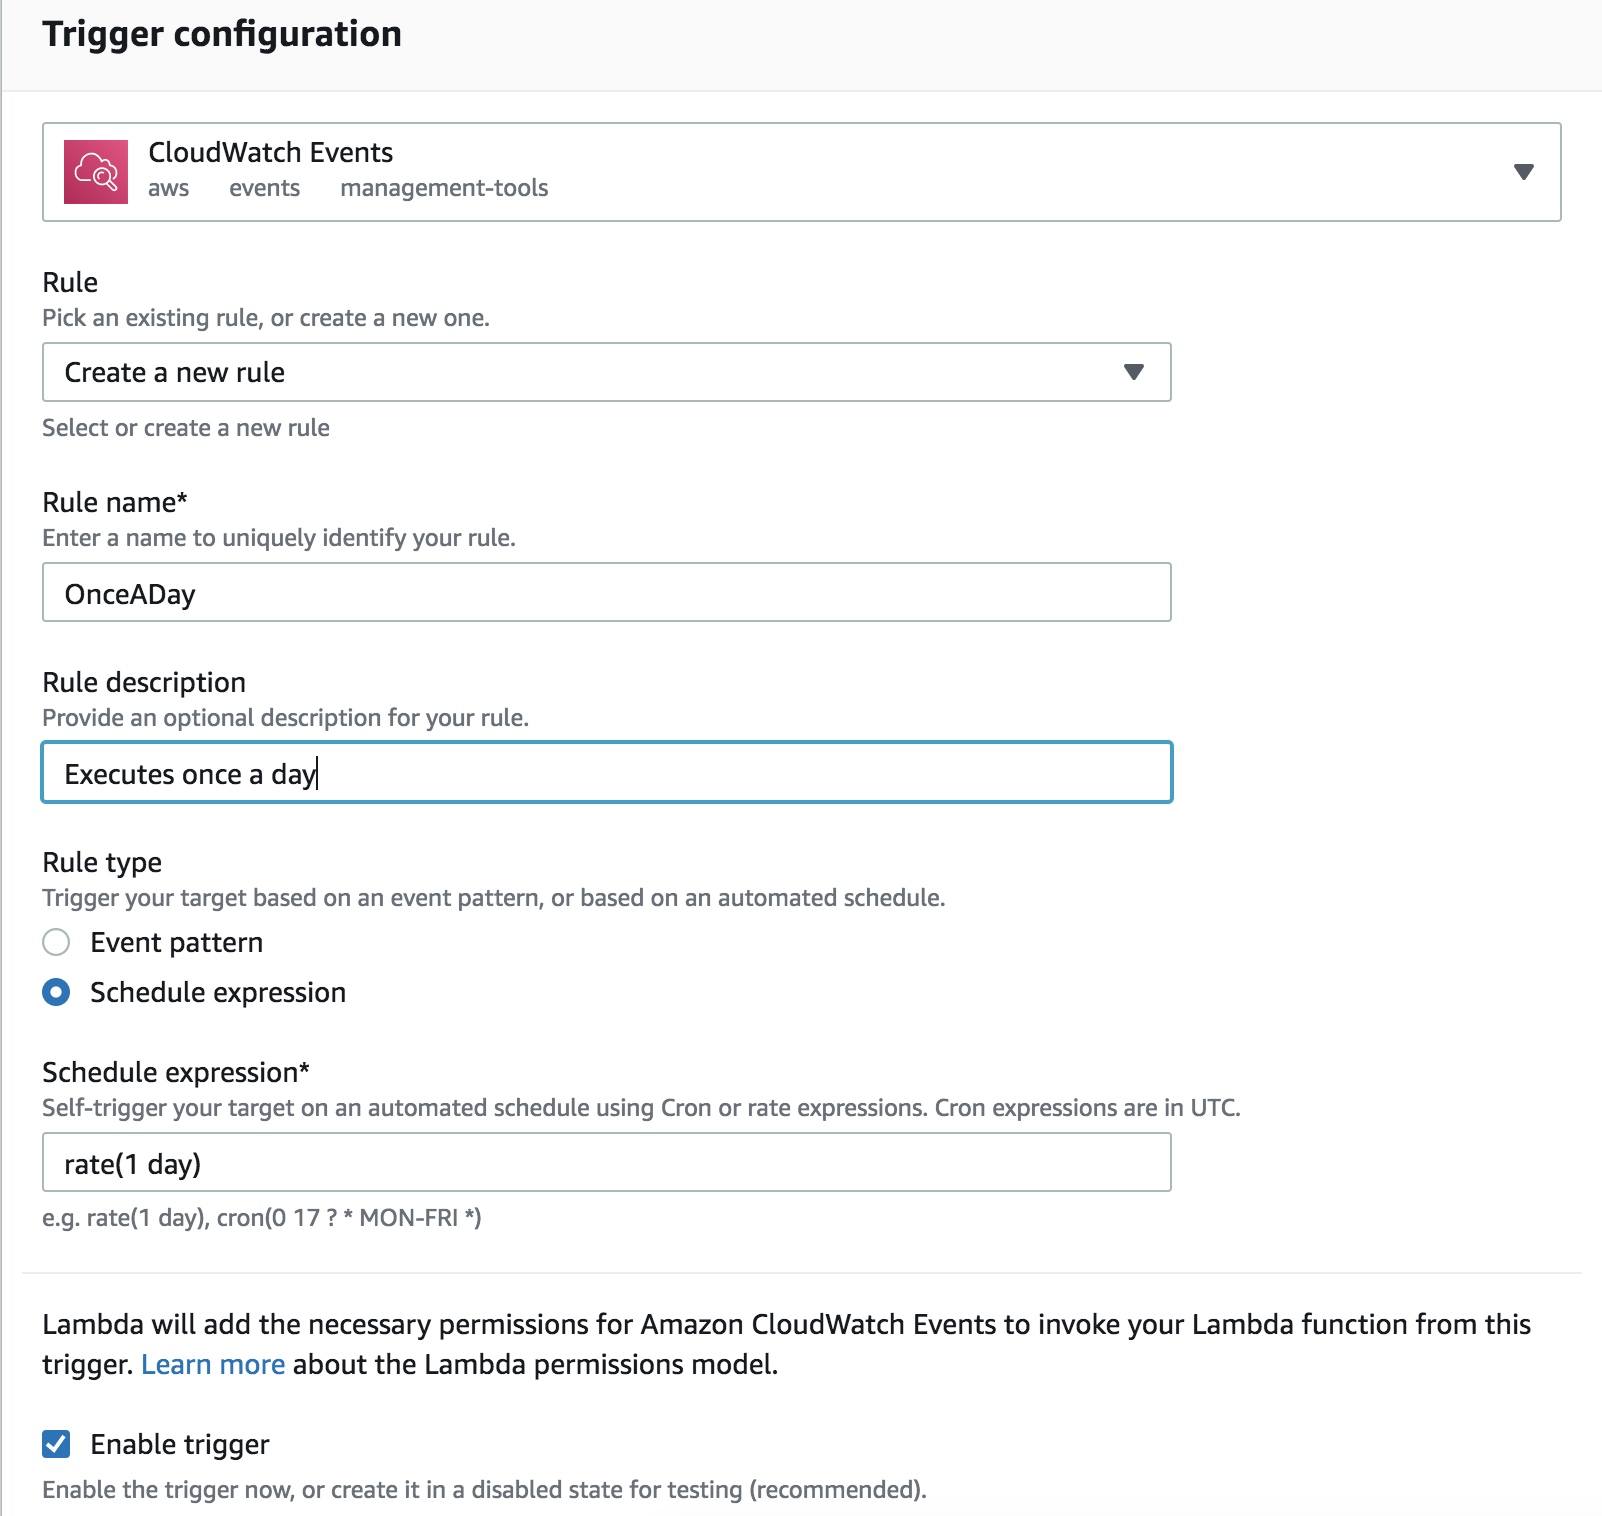
You should now see the CloudWatch Events trigger summary in the designer view.

To see the cloudwatch scheduled event in action, you might want to change the schedule to something more frequent like once a minute.
Summary
In this tutorial we learned how to do the following:
- Create a lambda function from scratch with basic permissions
- Update code using the in-browser code editor
- View log output for a lambda function execution
- Attach an event trigger such as CloudWatch scheduled events
To delete your lambda function, navigate back to the functions dashboard and click on Actions -> Delete.
